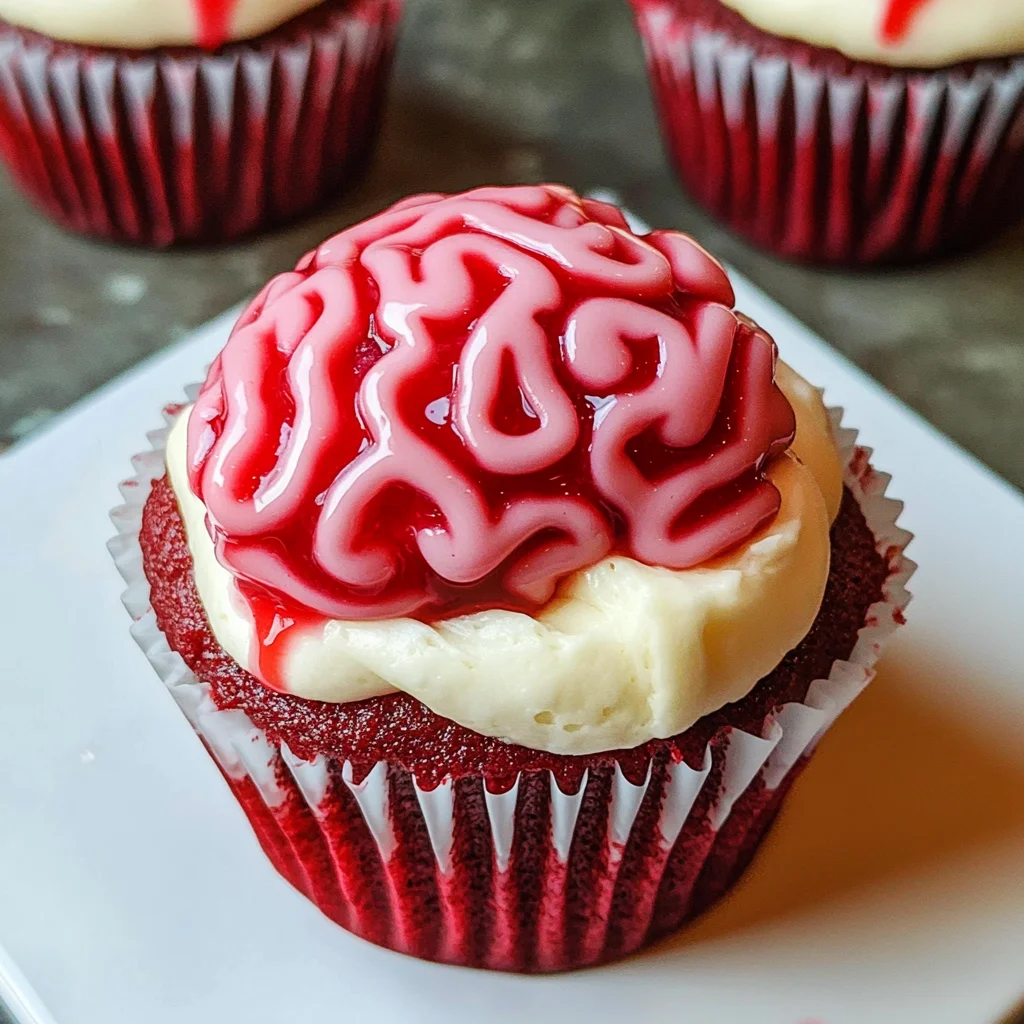
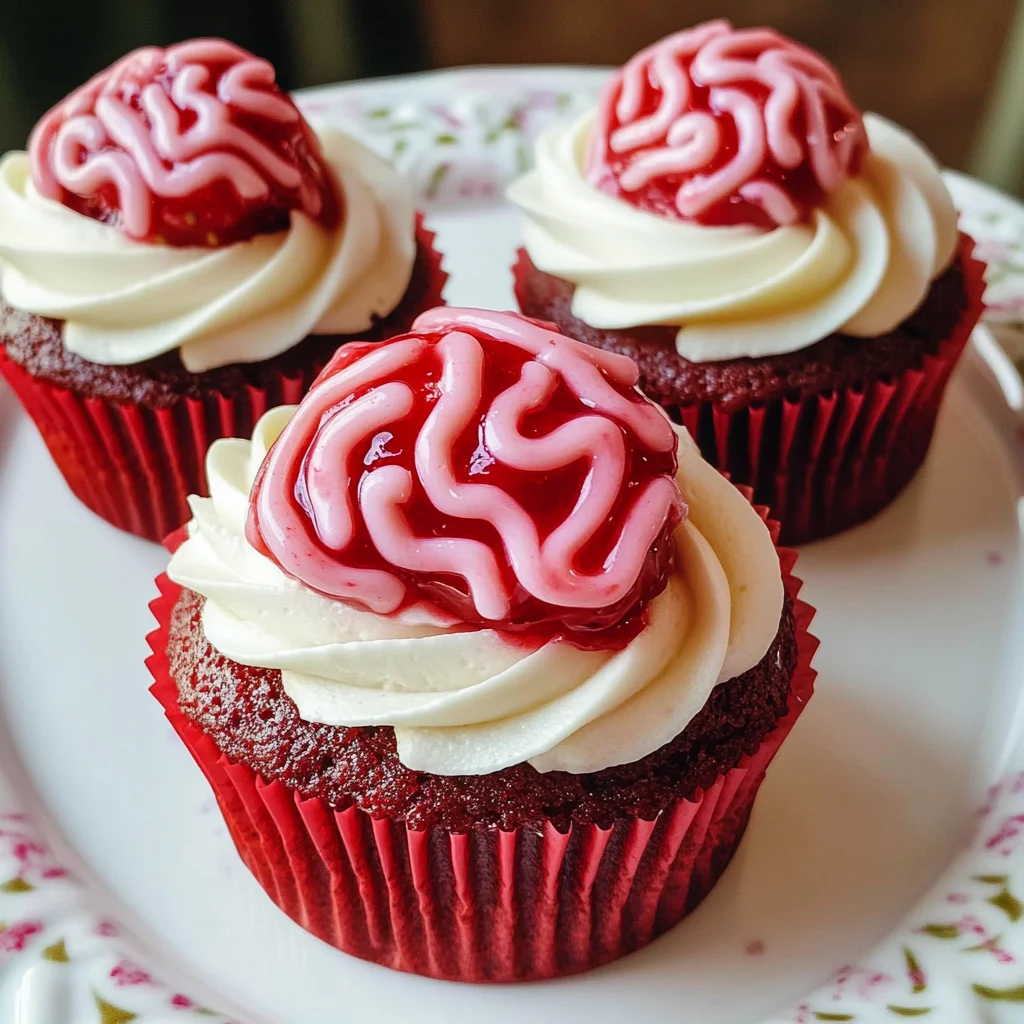
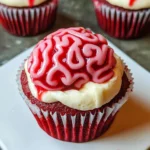
Bleeding Brain Cupcakes
If you’re looking for a spooky yet delightful treat, then you’ve stumbled upon the perfect recipe! These Bleeding Brain Cupcakes are not only visually striking, but they also combine the rich flavors of red velvet with a sweet jam surprise in the center. They are a fantastic addition to any Halloween gathering or a fun baking project with the kids. I promise, once you whip up these cupcakes, they will become your go-to dessert for festive occasions!
Imagine the joy on your family’s faces when they bite into these vibrant cupcakes and discover the delicious jam oozing out. They’re sure to be the star of any party!
Why You’ll Love This Recipe
- Easy to make: With simple steps and common ingredients, you can whip these up even on a busy day!
- Family-friendly: Kids will adore decorating and eating these fun cupcakes, making it a great family activity.
- Perfect for any occasion: Whether it’s Halloween or just a fun weekend treat, these cupcakes fit right in.
- Deliciously decadent: The combination of red velvet and sweet jam creates a flavor that everyone loves.
- Impressive presentation: The brain-themed icing makes these cupcakes look stunning and unique!
Ingredients You’ll Need
Let’s gather our ingredients! This recipe uses simple, wholesome items that you probably already have at home or can easily find at your local grocery store. Here’s what you need:
For the Cupcakes
- 150 g Butter or baking spread (softened, unsalted)
- 150 g Caster sugar
- 2 Eggs (large)
- 1 tsp Vanilla extract
- 85 ml Buttermilk
- 165 g Self-raising flour
- 1 1/2 tbsp Cocoa powder
- 1/2 tsp Bicarbonate of soda
- 1 tsp Red food colouring (I use Pro Gel or Sugarflair)
- 200 g Strawberry or Raspberry Jam
For the Buttercream Topping
- 200 g Butter (unsalted, softened)
- 400 g Icing sugar
- 1 tsp Vanilla extract
- 2 tbsp Milk
- Pink food colouring (I use Pro Gel or Sugarflair)
Variations
This recipe is quite flexible! Feel free to get creative with different flavors and decorations. Here are some fun ideas:
- Change the jam: Swap out strawberry or raspberry jam for your favorite fruit flavor like blueberry or cherry for an exciting twist!
- Try different colors: Use green or blue food coloring for a different spooky effect that can match your Halloween theme.
- Add sprinkles: Top off your buttercream with edible glitter or spooky sprinkles to add an extra touch of fun.
- Make it gluten-free: Substitute self-raising flour with a gluten-free blend to accommodate dietary preferences.
How to Make Bleeding Brain Cupcakes
Step 1: Preheat Your Oven
Start by preheating your oven to 160C Fan/180C/350F/Gas Mark 4. This step is crucial as it ensures that your cupcakes bake evenly and rise beautifully. While waiting for the oven, line a cupcake tin with black cupcake cases to set the spooky mood!
Step 2: Cream Butter and Sugar
In a mixing bowl, whisk together the softened butter and caster sugar until fluffy. Using an electric mixer makes this step easier and helps incorporate air into the mixture, which gives your cupcakes their lovely light texture.
Step 3: Add Eggs and Vanilla
Next, add in two large eggs along with one teaspoon of vanilla extract. Mix them in well until combined. Eggs help bind all the ingredients together while adding moisture.
Step 4: Combine Wet and Dry Ingredients
Now it’s time to mix in buttermilk, cocoa powder, bicarbonate of soda, red food coloring, and self-raising flour. Stir until everything is nicely combined—don’t overmix; we want those cupcakes light and airy!
Step 5: Fill Your Cases
Divide the cupcake batter evenly among your lined cupcake cases. Don’t fill them too high; about two-thirds full works best so they have room to rise without spilling over.
Step 6: Bake
Pop those beauties in the oven for about 20-25 minutes! Keep an eye on them; they’re ready when a skewer inserted into the center comes out clean.
Step 7: Cool Down
Once baked, transfer your cupcakes to a cooling rack. It’s important they cool completely before proceeding with filling them—this helps maintain their shape and texture.
Step 8: Create Jam Filling
When cooled, use a cupcake corer or knife to make a hole in each cupcake’s center. Fill each hole generously with strawberry or raspberry jam using either a small spoon or piping bag for precision.
Step 9: Make Your Buttercream
For the buttercream topping, beat softened butter alone in a mixing bowl first until creamy. Then gradually add icing sugar, milk, vanilla extract, and just enough pink food coloring to achieve that perfect pale pink shade.
Step 10: Pipe Your Icing
Transfer your buttercream into a piping bag fitted with a round nozzle. Pipe along the center of each cupcake first then add squiggles on either side for that brain effect—let your creativity flow!
Step 11: Store Safely
Keep your Bleeding Brain Cupcakes in an airtight container in a cool place. Enjoy them within three days for optimal freshness!
Now you’re all set to create some deliciously creepy treats! Enjoy baking these Bleeding Brain Cupcakes and watch them disappear at your next gathering!
Pro Tips for Making Bleeding Brain Cupcakes
Creating the perfect Bleeding Brain Cupcakes can be a delightful adventure, and a few expert tips will ensure your cupcakes turn out spectacularly!
- Use room temperature ingredients: Starting with butter, eggs, and buttermilk at room temperature helps achieve a smoother batter and fluffier cupcakes. This ensures even mixing and better texture.
- Don’t overmix the batter: Mixing just until combined prevents the cupcakes from becoming dense. Overmixing activates the gluten in the flour, leading to tough cupcakes instead of light and airy ones.
- Test for doneness with a skewer: Insert a skewer into the center of a cupcake; if it comes out clean, they are ready! This is a foolproof method to avoid underbaking or overbaking your treats.
- Chill your buttercream: If your buttercream is too soft to pipe, chill it for about 10 minutes before decorating. This helps achieve that perfect texture for piping those brain squiggles!
- Be creative with food coloring: When achieving that perfect pink hue for your icing, start with less food coloring. You can always add more, but it’s hard to lighten it once it’s too dark!
How to Serve Bleeding Brain Cupcakes
These spooky yet delicious cupcakes are not only fun to make but also visually stunning when served right! Here are some ideas for presenting them at your next Halloween gathering or themed party.
Garnishes
- Fresh berries: A few fresh strawberries or raspberries on top of each cupcake create a lovely contrast with the pink icing while reinforcing the fruity jam filling.
- Edible glitter: Sprinkling some edible glitter on top adds an enchanting effect that catches the light beautifully, making your cupcakes shine like stars.
Side Dishes
- Witch’s Brew Punch: A refreshing fruit punch made from mixed juices and soda can complement the sweetness of your cupcakes perfectly while adding a fun theme.
- Spooky Cheese Platter: A selection of cheeses shaped like ghosts or pumpkins paired with crackers gives your guests something savory to balance out the sweetness of the cupcakes.
- Veggie Skeletons: Arrange cut vegetables in fun shapes resembling skeletons or monsters to provide a healthy snack option that pairs well visually with the festive theme.
- Pumpkin Soup: A warm bowl of pumpkin soup spiced with nutmeg and cinnamon brings seasonal flavors that harmonize wonderfully with sweet treats.
With these serving suggestions and pro tips in hand, you’re all set to impress your friends and family with these delightful Bleeding Brain Cupcakes! Happy baking!
Make Ahead and Storage
These Bleeding Brain Cupcakes are perfect for meal prep, making them a fun addition to any Halloween party or spooky gathering! You can bake them in advance and store them properly to keep them fresh and delicious.
Storing Leftovers
- Allow the cupcakes to cool completely before storing.
- Place the cupcakes in an airtight container.
- Keep them at room temperature for up to 3 days.
- For longer freshness, consider refrigerating them.
Freezing
- To freeze, ensure the cupcakes are completely cool.
- Wrap each cupcake individually in cling film or aluminum foil.
- Place the wrapped cupcakes in a freezer-safe bag or container.
- They can be frozen for up to 2 months.
Reheating
- To enjoy frozen cupcakes, thaw them overnight in the refrigerator.
- Allow them to come to room temperature before serving for best flavor.
- If desired, you can warm them slightly in a microwave for about 10-15 seconds.
FAQs
Here are some common questions about making Bleeding Brain Cupcakes!
Can I make Bleeding Brain Cupcakes without buttermilk?
Yes, you can substitute buttermilk with an equal amount of milk mixed with a teaspoon of vinegar or lemon juice. Let it sit for a few minutes before using.
What if I don’t have red food coloring for my Bleeding Brain Cupcakes?
You can use beet juice or another natural red dye as an alternative. Just remember that it might slightly change the flavor!
How do I store leftover Bleeding Brain Cupcakes?
Store leftovers in an airtight container at room temperature for up to 3 days. For longer storage, freeze them wrapped individually.
Final Thoughts
These Bleeding Brain Cupcakes are not only visually striking but also incredibly delicious! They’re sure to be a hit at your Halloween festivities or any fun-themed event. I hope you have a blast making these spooky treats and that they bring smiles and delight to those who get to enjoy them. Happy baking, and don’t forget to share your creations!
Bleeding Brain Cupcakes
Get ready for Halloween with these fun Bleeding Brain Cupcakes—delicious red velvet filled with jam and topped with spooky pink icing!
- Prep Time: 20 minutes
- Cook Time: 25 minutes
- Total Time: 45 minutes
- Yield: Approximately 12 cupcakes 1x
- Category: Dessert
- Method: Baking
- Cuisine: American
Ingredients
- 150 g unsalted butter (softened)
- 150 g caster sugar
- 2 large eggs
- 1 tsp vanilla extract
- 85 ml buttermilk
- 165 g self-raising flour
- 1 1/2 tbsp cocoa powder
- 1/2 tsp bicarbonate of soda
- 1 tsp red food coloring
- 200 g strawberry or raspberry jam
- 200 g unsalted butter (softened)
- 400 g icing sugar
- 1 tsp vanilla extract
- 2 tbsp milk
- Pink food coloring
Instructions
- Preheat your oven to 160C Fan/180C/350F/Gas Mark 4 and line a cupcake tin with black cases.
- In a mixing bowl, cream softened butter and caster sugar until fluffy.
- Add eggs and vanilla extract; mix well until combined.
- Gradually incorporate buttermilk, cocoa powder, bicarbonate of soda, red food coloring, and self-raising flour until just mixed.
- Fill cupcake cases two-thirds full and bake for 20-25 minutes until a skewer comes out clean.
- Cool completely before filling with jam and piping buttercream icing on top.
Nutrition
- Serving Size: 1 cupcake
- Calories: 320
- Sugar: 34g
- Sodium: 120mg
- Fat: 15g
- Saturated Fat: 9g
- Unsaturated Fat: 5g
- Trans Fat: 0g
- Carbohydrates: 43g
- Fiber: 1g
- Protein: 2g
- Cholesterol: 30mg