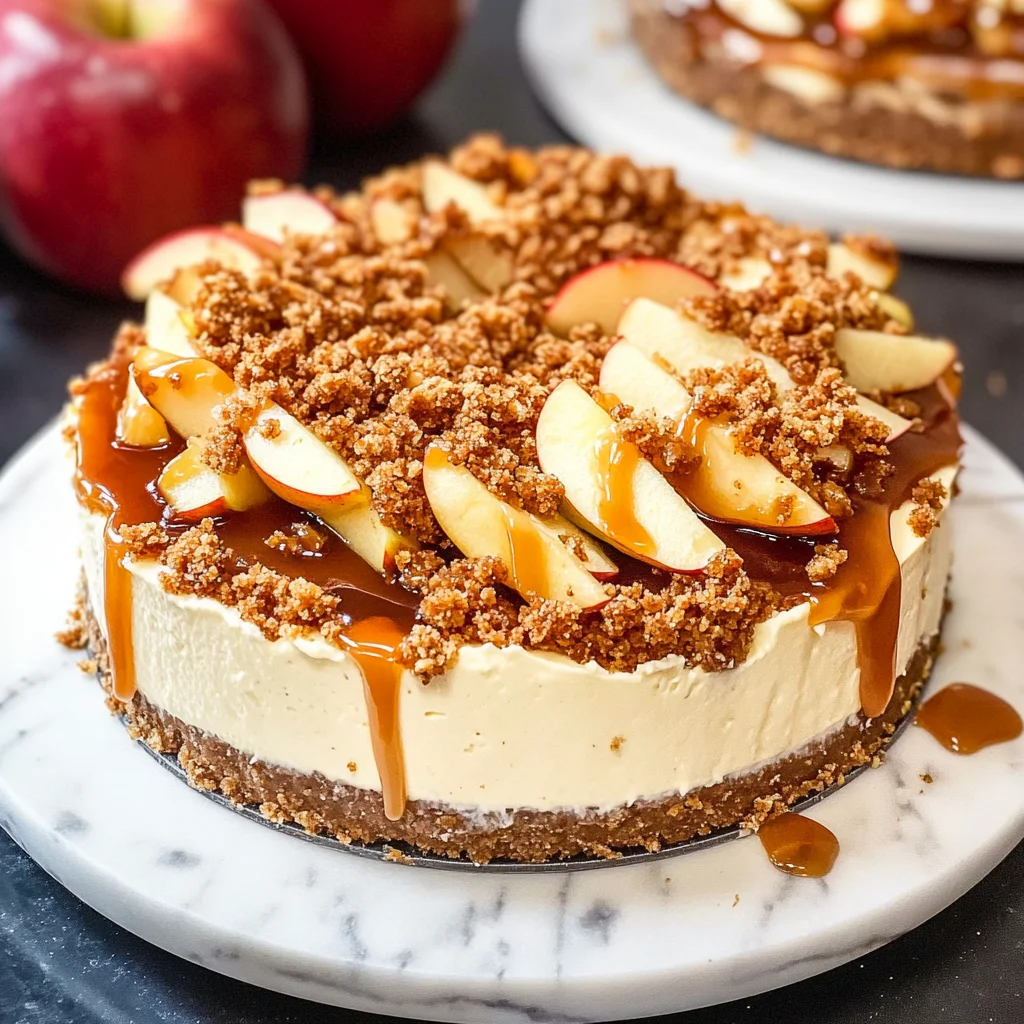
Apple Crisp Cheesecake
If you’re looking for a dessert that feels like a warm hug on a chilly day, then this Apple Crisp Cheesecake is just what you need! This delightful treat combines the creamy goodness of cheesecake with the comforting flavors of apple crisp. It’s perfect for any occasion, whether you’re hosting a family gathering or simply treating yourself after a long week. Trust me, once you take your first bite, you will understand why this recipe has earned a special place in my heart.
The beauty of this Apple Crisp Cheesecake is that it brings together so many beloved flavors in one dish. The thick graham cracker crust, tangy vanilla cheesecake filling, and spiced apple topping come together to create an unforgettable dessert experience. And if you top it with a drizzle of salted caramel? Pure heaven!
Why You’ll Love This Recipe
- Easy to make: With simple steps and straightforward ingredients, you’ll find this recipe manageable even on busy days.
- Family-friendly: Kids and adults alike will love the sweet, rich flavor combination of cheesecake and apple crisp.
- Perfect for sharing: Whether it’s a potluck or a holiday dinner, this cheesecake is bound to impress your friends and family.
- Make-ahead convenience: You can prepare it in advance, making it ideal for those special occasions when you want to enjoy your time with guests.
Ingredients You’ll Need
Let’s gather our ingredients! This Apple Crisp Cheesecake uses simple and wholesome ingredients that are likely already in your pantry. Each component plays an essential role in creating that delightful balance of flavors and textures.
For the Crust
- 3 cups graham crumbs
- 3 tablespoons brown sugar
- 1/2 teaspoon cinnamon
- 1/2 cup unsalted butter (112 grams) (melted)
For the Apple Filling
- 2 large apples (I recommend Granny Smith or Gala)
- 2 tablespoons brown sugar
- 1 1/2 teaspoons cinnamon
For the Crumble Topping
- 1/2 cup all-purpose flour (63 grams)
- 1/2 cup brown sugar (100 grams)
- 1 teaspoon cinnamon
- 1/2 cup quick oats
- 1/4 cup unsalted butter (56 grams) (melted)
For the Cheesecake Filling
- 24 ounces full-fat cream cheese (680 grams) (room temperature)
- 3/4 cup granulated sugar (150 grams)
- 1/4 cup brown sugar (50 grams)
- 1/2 teaspoon cinnamon
- 1 tablespoon cornstarch (or 2 tablespoons all-purpose flour)
- 1 teaspoon vanilla extract
- 1/2 cup sour cream (120 ml) (room temperature)
- 3 large eggs (room temperature)
Other Ingredients
- boiling water (for the water bath)
- salted caramel sauce
Variations
One of the best things about this Apple Crisp Cheesecake recipe is its flexibility! Feel free to get creative based on your taste preferences or what you have on hand.
- Change up the fruit: Use pears or peaches instead of apples for a delicious twist.
- Add nuts: Sprinkle some chopped walnuts or pecans into the crumble for extra crunch.
- Try different spices: Experiment with nutmeg or ginger to give your cheesecake an added layer of flavor.
- Make it gluten-free: Substitute graham crumbs with gluten-free options to accommodate dietary needs.
How to Make Apple Crisp Cheesecake
Step 1: Prepare Your Pan
Preheat your oven to 350°F (180°C). Start by wrapping the outside of a 9-inch springform pan with tin foil. This step is essential as it prevents water from leaking into your cheesecake during baking. Be sure to wrap it at least 3-4 times so that all seams are covered. Lightly grease the pan with non-stick cooking spray to ensure easy removal later.
Step 2: Make the Crust
In a large bowl, combine graham crumbs, brown sugar, cinnamon, and melted butter. Mix until everything is well combined and resembles wet sand. Press this mixture firmly into the bottom of your prepared springform pan. This crust will provide a sturdy base for our creamy filling.
Step 3: Prepare the Apples
Peel and slice your apples into thin wedges. In another bowl, toss them with brown sugar and cinnamon until they’re evenly coated. This process not only enhances their sweetness but also infuses them with delicious spice.
Step 4: Create the Crumble Topping
In yet another bowl, mix together flour, brown sugar, cinnamon, quick oats, and melted butter until crumbly. This topping will add texture and crunch to your cheesecake while contrasting beautifully with its creaminess.
Step 5: Make the Cheesecake Filling
In a mixing bowl, beat room temperature cream cheese until smooth. Gradually add granulated sugar and brown sugar while continuing to mix. Incorporate cinnamon, cornstarch, vanilla extract, sour cream, and eggs one at a time until fully combined. Be careful not to overmix; we want our filling light and fluffy!
Step 6: Assemble the Cheesecake
Pour half of the cheesecake filling over the crust in your springform pan. Next, layer on half of the spiced apples followed by half of the crumble topping. Repeat these layers again—cheesecake filling, apples, crumble—until everything is used up.
Step 7: Bake & Cool
Place your springform pan inside a larger baking dish filled halfway with boiling water; this creates a water bath that helps your cheesecake bake evenly without cracking. Bake for about 55 minutes or until set around the edges but slightly jiggly in the center.
Once baked, let it cool at room temperature before refrigerating for at least four hours—preferably overnight—to let those flavors meld beautifully.
Step 8: Serve & Enjoy!
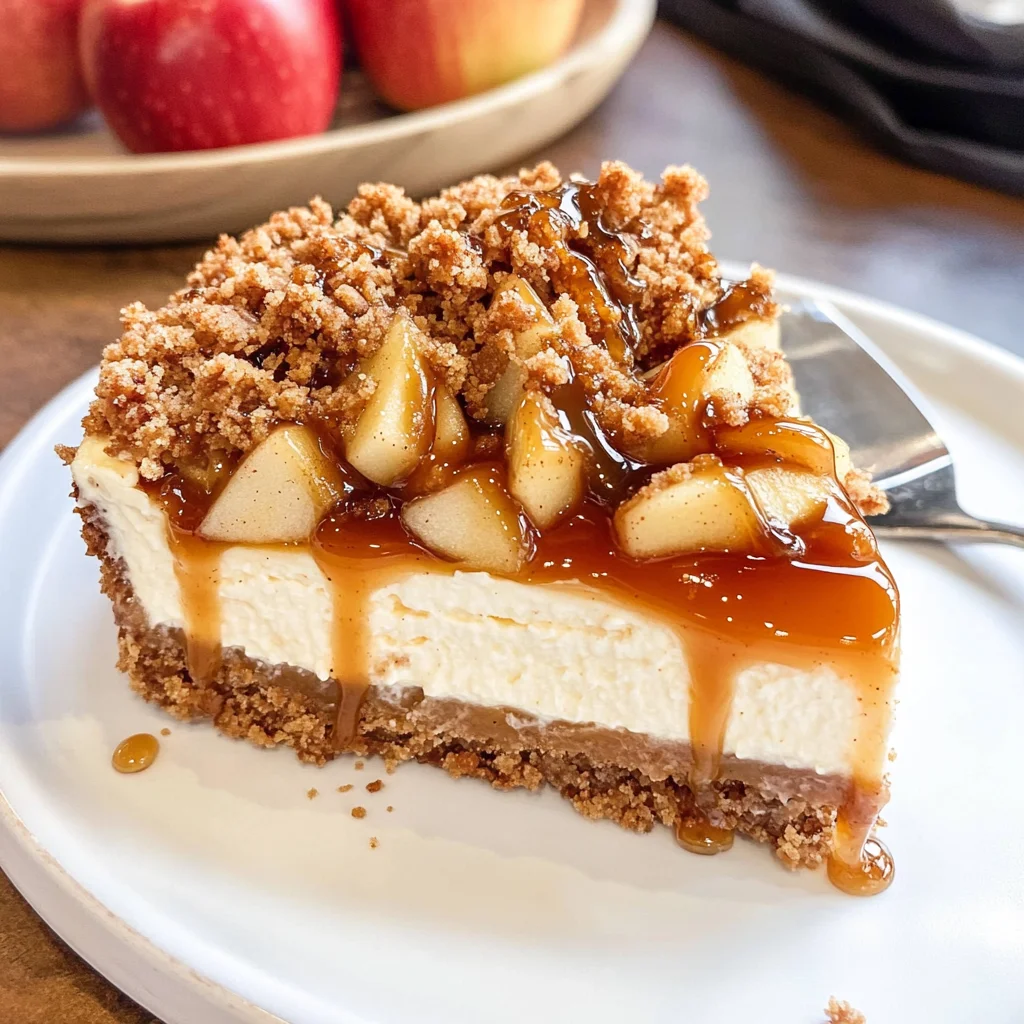
When ready to serve, carefully remove from the springform pan. Drizzle salted caramel sauce on top for that extra touch of indulgence! Slice into pieces and watch everyone fall in love with this Apple Crisp Cheesecake masterpiece!
Pro Tips for Making Apple Crisp Cheesecake
Making an apple crisp cheesecake can be a delightful adventure, and these handy tips will help ensure your dessert turns out perfectly every time!
- Use Room Temperature Ingredients: Bringing cream cheese, sour cream, and eggs to room temperature before mixing helps create a smoother batter. This prevents lumps and results in a creamier cheesecake.
- Don’t Overmix the Batter: Mixing too much can incorporate excess air, which may lead to cracks during baking. Mix just until combined for a flawless finish.
- Use a Water Bath: Baking your cheesecake in a water bath helps regulate the temperature and moisture, resulting in a creamy texture and minimizing the chance of cracking.
- Cool Gradually: After baking, allow your cheesecake to cool in the oven with the door slightly ajar. This gradual cooling process helps prevent sudden temperature changes that can cause cracks.
- Chill Before Serving: Let your cheesecake cool completely at room temperature before refrigerating it for at least 4 hours (or overnight). Chilling enhances the flavors and makes slicing easier!
How to Serve Apple Crisp Cheesecake
Serving your apple crisp cheesecake beautifully can elevate its appeal and make any gathering feel special. Here are some ideas on how to present this delightful dessert!
Garnishes
- Whipped Cream: A dollop of homemade whipped cream adds a light and airy touch that complements the rich flavors of the cheesecake.
- Cinnamon Dusting: A sprinkle of cinnamon on top provides an aromatic finish that enhances the apple flavor while adding visual appeal.
- Chopped Nuts: Toasted pecans or walnuts can add a delightful crunch and additional flavor contrast against the creamy filling.
Side Dishes
- Vanilla Ice Cream: A scoop of vanilla ice cream pairs wonderfully with warm cheesecake, creating an indulgent treat that’s hard to resist.
- Caramel Sauce: Drizzling homemade or store-bought caramel sauce over each slice adds extra sweetness and richness that complements the apple crisp topping.
- Fresh Fruit Salad: A refreshing fruit salad with seasonal fruits like berries or citrus balances out the richness of the cheesecake, providing a light contrast.
- Coffee or Tea: Serving your cheesecake alongside a warm cup of coffee or herbal tea creates a comforting experience perfect for cozy gatherings.
With these serving suggestions and pro tips, you’re all set to impress family and friends with your delicious Apple Crisp Cheesecake! Enjoy every moment as you share this delightful dessert.
Make Ahead and Storage
This Apple Crisp Cheesecake is perfect for meal prep! You can make it ahead of time, allowing the flavors to meld beautifully. It also stores well, making it an ideal dessert for gatherings or a sweet treat throughout the week.
Storing Leftovers
- Allow the cheesecake to cool completely before storing.
- Cover it with plastic wrap or aluminum foil to keep it fresh.
- Store in the refrigerator for up to 5 days.
Freezing
- To freeze, ensure the cheesecake is completely cooled and wrapped tightly in plastic wrap.
- Place it in an airtight container or a freezer bag.
- Freeze for up to 3 months. Thaw overnight in the refrigerator before serving.
Reheating
- If you prefer warm cheesecake, slice a piece and place it on a microwave-safe dish.
- Heat in the microwave for about 15-20 seconds at a time until warm, being careful not to overheat.
- Enjoy your cheesecake warm or at room temperature!
FAQs
Here are some frequently asked questions about Apple Crisp Cheesecake.
Can I use different types of apples for Apple Crisp Cheesecake?
Absolutely! While Granny Smith and Gala apples work wonderfully, you can experiment with other varieties like Honeycrisp or Fuji for different flavor profiles.
How long does Apple Crisp Cheesecake last in the fridge?
When properly stored, Apple Crisp Cheesecake can last up to 5 days in the refrigerator. Just be sure to keep it covered!
Can I make Apple Crisp Cheesecake without sour cream?
Yes, if you don’t have sour cream on hand, you can substitute it with Greek yogurt. It will still provide that creamy texture and tangy flavor!
What should I serve with Apple Crisp Cheesecake?
A drizzle of salted caramel sauce complements this dessert beautifully. You can also serve it with whipped topping or a scoop of vanilla ice cream for an extra indulgent treat.
Final Thoughts
I hope you enjoy making this delightful Apple Crisp Cheesecake as much as I do! The combination of creamy cheesecake, spiced apples, and crunchy crumble creates a dessert that’s hard to resist. Whether you’re sharing this treat with family or treating yourself after a long day, it’s sure to bring joy. Happy baking!
Apple Crisp Cheesecake
If you’re in search of a comforting dessert that warms the soul, this Apple Crisp Cheesecake is your answer. It masterfully blends the velvety richness of cheesecake with the nostalgic flavors of spiced apples and a crunchy crumble topping. Perfect for family gatherings, holiday celebrations, or simply indulging after a long week, each bite promises a delightful experience that will keep you coming back for more. Drizzle it with salted caramel for an extra touch of decadence, and watch as it becomes the star of any dessert table.
- Prep Time: 30 minutes
- Cook Time: 55 minutes
- Total Time: 1 hour 25 minutes
- Yield: Serves approximately 12 people 1x
- Category: Dessert
- Method: Baking
- Cuisine: American
Ingredients
- 3 cups graham crumbs
- 3 tablespoons brown sugar
- 1/2 teaspoon cinnamon
- 1/2 cup unsalted butter (melted)
- 2 large apples
- 2 tablespoons brown sugar
- 1 1/2 teaspoons cinnamon
- 1/2 cup all-purpose flour
- 1/2 cup brown sugar
- 1 teaspoon cinnamon
- 1/2 cup quick oats
- 1/4 cup unsalted butter (melted)
- 24 ounces full-fat cream cheese (room temperature)
- 3/4 cup granulated sugar
- 1/4 cup brown sugar
- 1/2 teaspoon cinnamon
- 1 tablespoon cornstarch
- 1 teaspoon vanilla extract
- 1/2 cup sour cream (room temperature)
- 3 large eggs (room temperature)
- boiling water (for the water bath)
- salted caramel sauce
Instructions
- Preheat oven to 350°F (180°C) and prepare a 9-inch springform pan with foil.
- Mix graham crumbs, brown sugar, cinnamon, and melted butter; press into the bottom of the pan.
- Toss peeled and sliced apples with brown sugar and cinnamon.
- Combine flour, brown sugar, cinnamon, oats, and melted butter for the crumble topping.
- Beat cream cheese until smooth; add sugars, cinnamon, cornstarch, vanilla extract, sour cream, and eggs until just combined.
- Layer half of the cheesecake filling, apples, and crumble in the pan; repeat layers.
- Bake in a water bath for about 55 minutes until set around edges; cool before refrigerating at least four hours.
Nutrition
- Serving Size: 1 slice (108g)
- Calories: 360
- Sugar: 22g
- Sodium: 290mg
- Fat: 22g
- Saturated Fat: 11g
- Unsaturated Fat: 10g
- Trans Fat: 0g
- Carbohydrates: 36g
- Fiber: 1g
- Protein: 6g
- Cholesterol: 70mg