Japanese Katsu Bowls: A Delicious Guide to Making Authentic Katsu at Home
If you’re looking for a dish that brings warmth and comfort to your table, look no further than Japanese Katsu Bowls: A Delicious Guide to Making Authentic Katsu at Home. This recipe is a treasured favorite in my kitchen because it combines crispy, golden-brown katsu with fluffy rice and a tangy sauce that’s simply irresistible. Whether you’re preparing a quick weeknight dinner or impressing guests at a family gathering, this delightful meal is sure to become a go-to for anyone who loves delicious food.
Not only is Chicken Katsu incredibly satisfying, but it’s also easy to prepare. With just a handful of simple ingredients, you can recreate this Japanese classic right in your own home. So grab your apron and let’s get cooking!
Why You’ll Love This Recipe
- Quick and Easy: This recipe comes together in under an hour, making it perfect for busy nights.
- Family-Friendly: Kids and adults alike will love the crispy chicken and flavorful rice.
- Customizable: Feel free to tweak the toppings or protein to suit your taste!
- Make-Ahead Friendly: Cook the components in advance for an even quicker meal later.
- Deliciously Satisfying: The combination of textures and flavors will leave everyone asking for seconds.
Ingredients You’ll Need
These ingredients are not only simple but also wholesome, allowing the flavors of each component to shine through. Gather these essentials before we dive into the cooking process!
For the Katsu
- 2 boneless chicken breasts (or beef loin, if preferred)
- Salt and pepper, to taste
- 1 cup all-purpose flour
- 2 large eggs
- 1 cup panko breadcrumbs
- Vegetable oil, for frying
For the Rice
- 2 cups Japanese short-grain rice
- 2 ½ cups water
- 1 tablespoon rice vinegar
- 1 tablespoon sugar
- ½ teaspoon salt
For the Sauce
- ¼ cup tonkatsu sauce (or store-bought if you prefer)
- 1 tablespoon soy sauce
- 1 teaspoon Worcestershire sauce
- 1 teaspoon ketchup
For Garnish
- 1 cup shredded cabbage
- 2 green onions, sliced
- Sesame seeds, for garnish
- Pickled ginger (optional)
Variations
The beauty of making Katsu Bowls lies in their flexibility! You can easily adjust flavors or ingredients based on what you have on hand or your family’s preferences.
- Swap the protein: Try using thinly sliced beef or even tofu for a vegetarian option.
- Change up the toppings: Add sliced avocado, carrots, or radishes for extra crunch and nutrition.
- Make it spicy: Include some sriracha or chili flakes in your sauce for a kick!
- Serve with different grains: Substitute the rice with quinoa or cauliflower rice for a healthier twist.
How to Make Japanese Katsu Bowls: A Delicious Guide to Making Authentic Katsu at Home
Step 1: Rinse the Rice
Start by rinsing the rice under cold water until the water runs clear. This step is important as it removes excess starch, ensuring your rice turns out fluffy and not sticky.
Step 2: Soak the Rice
Transfer the rinsed rice to a saucepan and add 2 ½ cups of water. Let it soak for about 30 minutes. Soaking helps achieve perfectly cooked rice by allowing it to absorb some water before boiling.
Step 3: Cook the Rice
Cover your saucepan and bring the water to a boil. Once boiling, reduce heat and simmer for 15 minutes without lifting the lid. After that time, turn off the heat and let it sit covered for another 10 minutes—this will finish cooking while keeping it warm.
Step 4: Season the Rice
In a small bowl, mix together rice vinegar, sugar, and salt until dissolved. Gently fold this mixture into your cooked rice. This adds a subtle flavor that elevates your dish!
Step 5: Prepare the Chicken
Pound each chicken breast to an even thickness of about ½ inch; this ensures they cook evenly. Season both sides with salt and pepper for added flavor.
Step 6: Set Up Your Breading Station
Create a breading station with three bowls: one with flour, one with beaten eggs, and one with panko breadcrumbs. This organized setup makes coating your chicken easy and efficient!
Step 7: Bread the Chicken
Dredge each piece of chicken in flour first, then dip it into eggs before coating with panko breadcrumbs. The layers create that signature crispy texture we all love.
Step 8: Fry the Chicken
Heat vegetable oil in a skillet over medium heat. Fry each piece of chicken for about 4-5 minutes per side until golden brown and cooked through. This step creates that delightful crunch!
Step 9: Drain and Slice
Once cooked, drain the chicken on paper towels to remove excess oil. Let them rest briefly before slicing them into strips—this keeps them juicy!
Step 10: Make the Sauce
In a separate bowl, combine tonkatsu sauce, soy sauce, Worcestershire sauce, and ketchup. Mix well until smooth; this tangy sauce ties all flavors together beautifully.
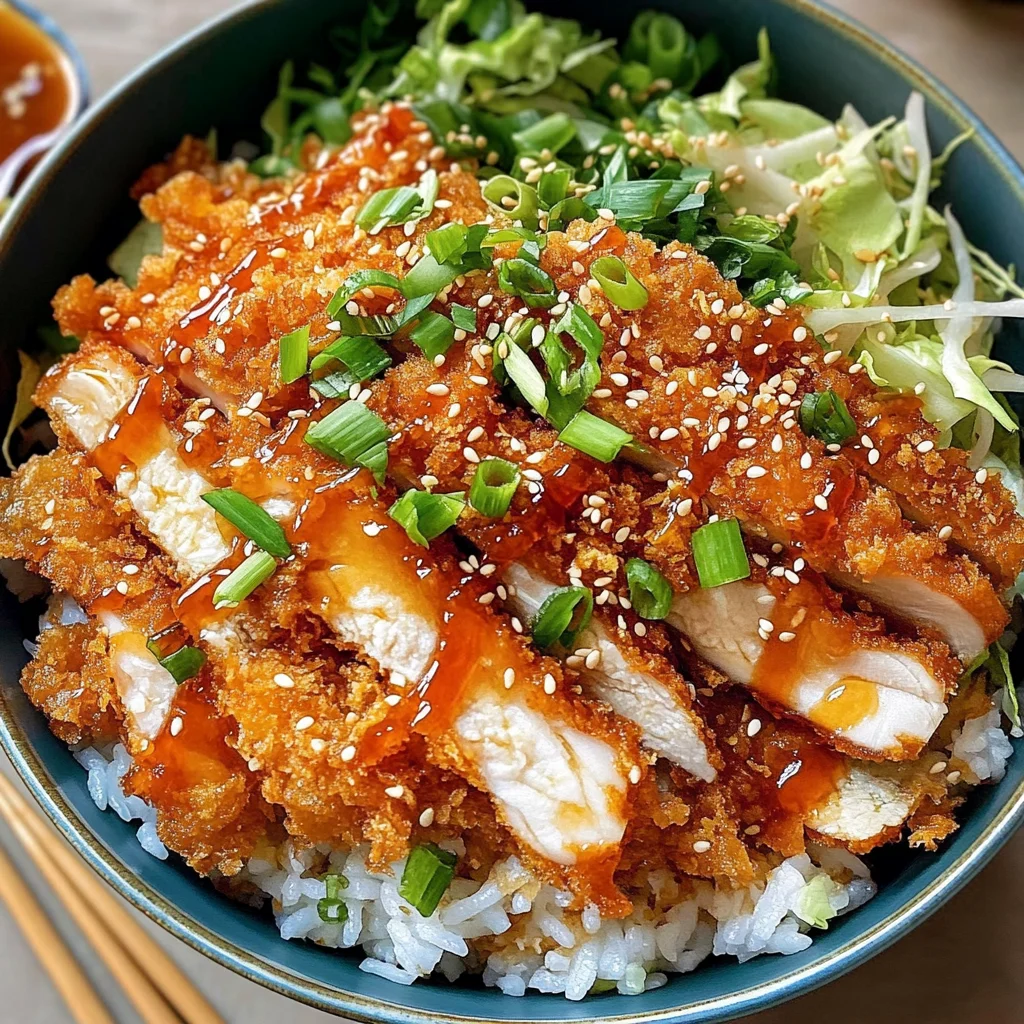
Step 11: Assemble Your Bowls
To serve, place seasoned rice on plates as a base. Top generously with sliced katsu, shredded cabbage, green onions, and sprinkle sesame seeds on top. Drizzle with your prepared sauce before adding pickled ginger if desired.
And there you have it—a warm bowl of homemade Japanese Katsu Bowls ready to be enjoyed!
Pro Tips for Making Japanese Katsu Bowls: A Delicious Guide to Making Authentic Katsu at Home
Making katsu at home is a delightful experience, and with these pro tips, you’ll achieve that restaurant-quality dish right in your kitchen!
-
Choose the Right Chicken: Starting with boneless, skinless chicken breasts ensures that your katsu is tender and juicy. If you prefer beef, opt for beef loin, which also works beautifully for this dish.
-
Use Panko Breadcrumbs: The secret to achieving that signature crispy texture lies in using panko breadcrumbs. They’re coarser than regular breadcrumbs and create a light, airy crust that’s irresistible.
-
Temperature Check: Make sure your oil is hot enough (around 350°F/175°C) before frying. This helps seal the breading quickly and prevents the chicken from absorbing too much oil, resulting in a lighter katsu.
-
Rest Before Slicing: Allowing the fried chicken to rest for a few minutes after cooking helps retain its juices. This step ensures every bite of your katsu is moist and flavorful.
-
Perfectly Seasoned Rice: Don’t skip the step of mixing rice vinegar, sugar, and salt into your rice. This adds a subtle flavor boost that complements the savory katsu beautifully.
How to Serve Japanese Katsu Bowls: A Delicious Guide to Making Authentic Katsu at Home
Presenting your homemade katsu bowls can elevate the meal from simple to spectacular! Here are some ideas to make your dish visually appealing and even more delicious.
Garnishes
- Sesame Seeds: A sprinkle of toasted sesame seeds adds a nutty flavor and a lovely crunch that enhances the overall dish.
- Sliced Green Onions: Fresh green onions not only provide a pop of color but also add a fresh, mildly spicy finish to each bite.
- Pickled Ginger: Offering pickled ginger on the side can provide a refreshing contrast to the rich flavors of the katsu.
Side Dishes
- Miso Soup: This classic Japanese soup made with miso paste, tofu, and seaweed offers warmth and depth to your meal. It’s light yet satisfying alongside katsu.
- Edamame: Steamed edamame sprinkled with sea salt makes for a nutritious side that’s easy to prepare and adds a delightful crunch.
- Japanese Potato Salad: Creamy potato salad made with Japanese mayo offers a sweet and tangy flavor profile that balances well with the savory notes of the katsu.
- Cucumber Salad: A refreshing cucumber salad dressed in rice vinegar can cut through the richness of the fried chicken, adding brightness to your plate.
With these tips on serving and garnishing, you’re well on your way to impressing family or friends with an authentic Japanese dining experience right at home! Enjoy making your katsu bowls!
Make Ahead and Storage
This Chicken Katsu recipe is perfect for meal prep! You can easily make it ahead of time, allowing you to enjoy delicious homemade katsu throughout the week.
Storing Leftovers
- Allow the chicken katsu to cool completely before storing.
- Place leftover katsu in an airtight container and refrigerate for up to 3 days.
- Store cooked rice separately in a sealed container.
Freezing
- For longer storage, freeze the cooked chicken katsu in an airtight container or freezer bag for up to 2 months.
- You can also freeze cooked rice in a separate container.
- Make sure to label containers with the date for easy tracking.
Reheating
- To reheat chicken katsu, place it in a preheated oven at 350°F (175°C) for about 10-15 minutes until heated through and crispy.
- For rice, add a splash of water and cover while reheating in the microwave to prevent it from drying out.
- Enjoy with freshly made sauce!
FAQs
Here are some common questions you might have about making Japanese Katsu Bowls:
Can I use other proteins instead of chicken for my Japanese Katsu Bowls?
Absolutely! While this recipe features chicken, you can use beef loin or even tofu for a vegetarian option. Just adjust cooking times accordingly.
How do I make the sauce for my Japanese Katsu Bowls?
You can easily make your own sauce by mixing tonkatsu sauce with soy sauce, Worcestershire sauce, and ketchup. This combination enhances the flavors beautifully!
What can I serve alongside my Japanese Katsu Bowls?
Pair your katsu bowls with steamed vegetables or a light salad for a balanced meal. It’s also delightful with miso soup!
Are Japanese Katsu Bowls suitable for meal prep?
Yes! These bowls are fantastic for meal prep. You can prepare them ahead of time and store them in the fridge or freezer as detailed above.
How do I ensure my chicken katsu stays crispy?
To keep your chicken katsu crispy, it’s best to fry it just before serving. If you need to reheat leftovers, using an oven helps maintain that crunchiness.
Final Thoughts
I hope you enjoy making these delicious Japanese Katsu Bowls! This recipe is so special because it brings the taste of Japan right into your kitchen while being simple enough for any home cook. Whether you’re sharing it with family or enjoying it solo, each bite is sure to make you smile. Happy cooking, and don’t hesitate to try this at home!
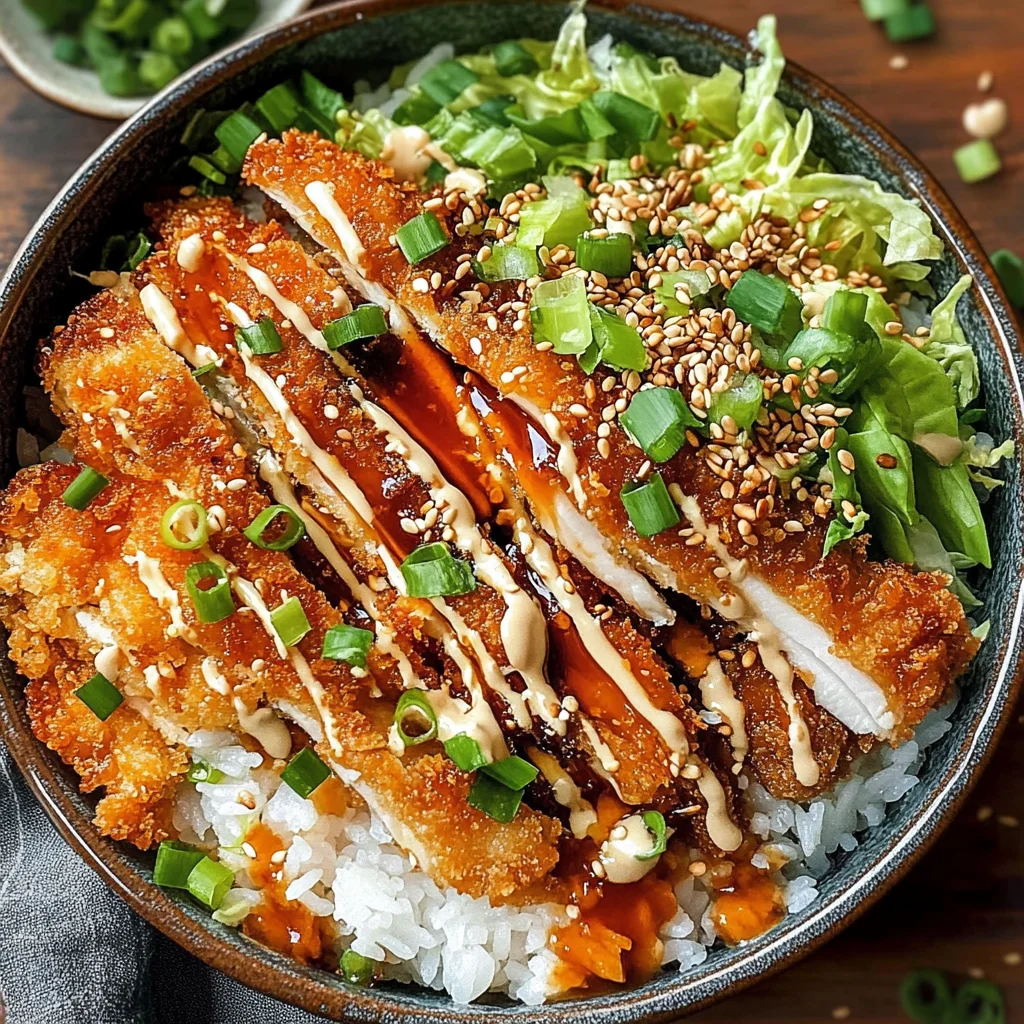
Japanese Katsu Bowls
If you’re searching for a comforting and satisfying meal, Japanese Katsu Bowls are the perfect choice. This dish features crispy chicken or beef katsu served over fluffy rice, drizzled with a tangy sauce that elevates every bite. Easy to prepare and customizable for various tastes, these bowls make an excellent option for both busy weeknights and special gatherings. With just a handful of wholesome ingredients, you can recreate this beloved Japanese classic right in your kitchen.
- Prep Time: 20 minutes
- Cook Time: 30 minutes
- Total Time: 50 minutes
- Yield: Serves 4
- Category: Main
- Method: Frying
- Cuisine: Japanese
Ingredients
- 2 boneless chicken breasts or beef loin
- Salt and pepper, to taste
- 1 cup all-purpose flour
- 2 large eggs
- 1 cup panko breadcrumbs
- Vegetable oil, for frying
- 2 cups Japanese short-grain rice
- 2 ½ cups water
- 1 tablespoon rice vinegar
- 1 tablespoon sugar
- ½ teaspoon salt
- ¼ cup tonkatsu sauce
- 1 tablespoon soy sauce
- 1 teaspoon Worcestershire sauce
- 1 teaspoon ketchup
- 1 cup shredded cabbage
- 2 green onions, sliced
- Sesame seeds, for garnish
- Pickled ginger (optional)
Instructions
- Rinse and soak 2 cups of Japanese short-grain rice in water for 30 minutes.
- Cook the rice by boiling it with 2 ½ cups of water, then simmer covered for 15 minutes.
- Pound chicken breasts to an even thickness; season with salt and pepper.
- Set up a breading station with flour, beaten eggs, and panko breadcrumbs.
- Bread the chicken by coating it in flour, then egg, followed by panko.
- Fry the chicken in vegetable oil over medium heat until golden brown on both sides.
- Mix tonkatsu sauce, soy sauce, Worcestershire sauce, and ketchup for the dressing.
- Assemble bowls with seasoned rice topped with sliced katsu and garnished with cabbage, green onions, sesame seeds, and sauce.
Nutrition
- Serving Size: 1 bowl (approx. 320g)
- Calories: 620
- Sugar: 4g
- Sodium: 850mg
- Fat: 28g
- Saturated Fat: 4g
- Unsaturated Fat: 20g
- Trans Fat: 0g
- Carbohydrates: 69g
- Fiber: 3g
- Protein: 32g
- Cholesterol: 160mg