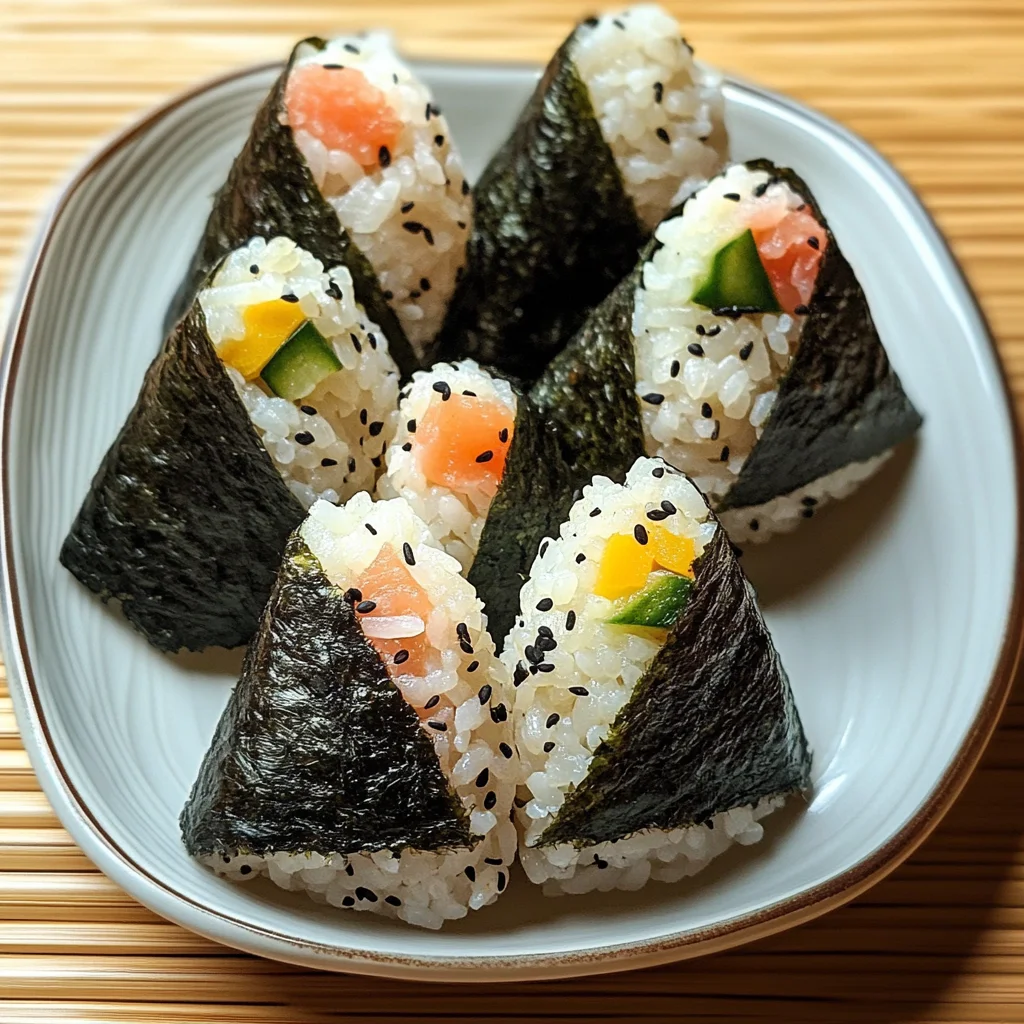
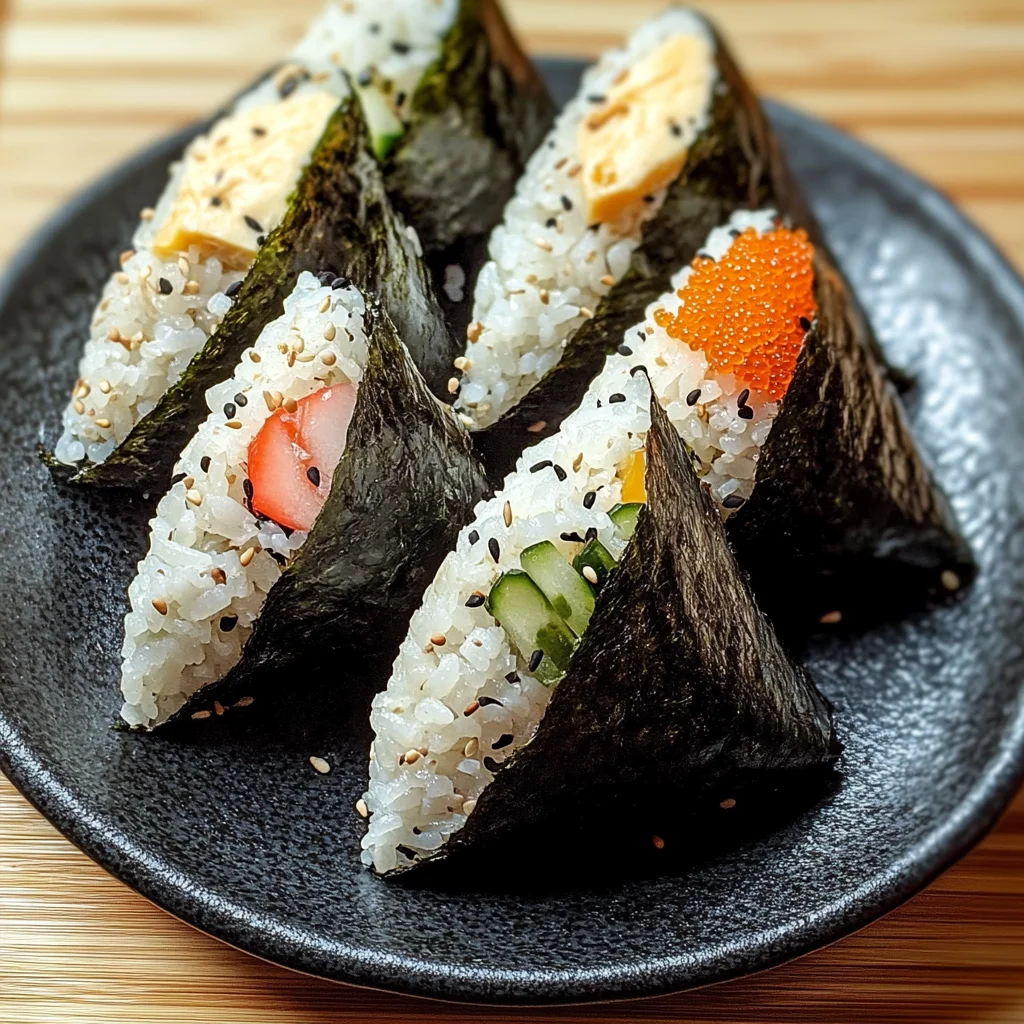
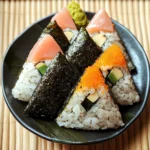
Onigiri AKA Japanese Rice Balls or Rice Triangles
If you’re looking for a fun and delicious way to enjoy rice, let me introduce you to Onigiri AKA Japanese Rice Balls or Rice Triangles! These little bites of joy are not just tasty; they also carry a special place in my heart. Growing up, my family would make them for picnics, school lunches, and even simple weeknight dinners. With their satisfying texture and endless filling possibilities, onigiri are perfect for any occasion—whether you’re feeding a crowd or just treating yourself.
What I love most about this recipe is its versatility. You can whip up these delightful rice balls in no time using simple ingredients that you probably already have at home. Plus, they’re great for meal prep! Make a batch ahead of time, and you’ll have a delicious snack ready whenever hunger strikes.
Why You’ll Love This Recipe
- Easy to Prepare: With just a few steps, you can create these delicious rice balls without any fuss.
- Family-Friendly: Kids love them! Get everyone involved in choosing fillings and shaping the onigiri.
- Endless Filling Options: From veggies to leftovers, the possibilities are truly endless for what you can stuff inside!
- Perfect for Meal Prep: Make them ahead of time and store them for quick snacks or lunches throughout the week.
Ingredients You’ll Need
Let’s gather our ingredients! This recipe uses simple, wholesome items that come together beautifully. Here’s what you’ll need:
- 2 cups short grain Japanese (japonica rice)
- 3 cups water
- 1/3 cup rice vinegar
- 3 tablespoons sugar
- 1 teaspoon salt
- 8 sheets roasted seaweed (nori or onigiri wrappers) (optional)
- One or more fillings (enough to fill 8 balls, which is about ½ to 3/4 cup)
Onigiri are so versatile that you can fill them with whatever your heart desires! Just make sure to keep it safe for room temperature storage if you plan to take them on the go.
Variations
One of the best parts about making onigiri is how flexible this recipe is! You can mix and match fillings based on what you like or what you have on hand. Here are some fun ideas:
- Swap the protein: Try using cooked chicken or tofu instead of traditional fillings.
- Add some crunch: Incorporate chopped cucumbers or pickled veggies for a refreshing crunch.
- Go gourmet: Experiment with unique flavors like spicy mayo or avocado for a creamy twist.
- Make it colorful: Use colorful veggies like bell peppers or carrots to brighten up your rice balls.
How to Make Onigiri AKA Japanese Rice Balls or Rice Triangles
Step 1: Rinse the Rice
Start by rinsing your rice in cold water at least five times until the water runs clear. This step is crucial because it removes excess starch that can make your rice gummy. If you’re using a rice cooker, simply add both the rinsed rice and cold water according to your cooker’s instructions.
Step 2: Cook the Rice
Once rinsed, cook your rice until it’s tender—about 20 minutes if you’re using the stovetop method. When all the liquid is absorbed, you’ll have fluffy rice that’s perfect for shaping into onigiri!
Step 3: Prepare Sushi Seasoning
While your rice cooks, combine the rice vinegar, sugar, and salt in a small saucepan over medium heat. Stir gently until everything is dissolved. This seasoning adds flavor and helps give your onigiri that authentic sushi taste.
Step 4: Mix the Seasoning with Rice
When your rice is done cooking, transfer it to a large bowl and let it cool slightly. Then gently stir in your sushi seasoning while the rice is still warm. This will ensure that every bite is infused with flavor!
Step 5: Shape Your Onigiri
Now comes the fun part! While the rice is still warm, shape each ball using wet hands or an onigiri mold. Create an indentation in the center of each ball to add about a tablespoon of filling before sealing it up again. If you’re feeling adventurous, try forming them into triangles!
Step 6: Wrap Your Onigiri
If using nori sheets or wrappers, wrap them around your freshly shaped onigiri once they’re cooled down enough to handle. They not only keep things neat but also add an extra layer of flavor!
Step 7: Serve and Enjoy
To serve your beautiful creations, unwrap any plastic wrap from around the nori if necessary. Enjoy them at room temperature as they are—a delicious snack that’s ready when you are!
Now that you’ve learned how to make Onigiri AKA Japanese Rice Balls or Rice Triangles, get creative with fillings and enjoy these delightful bites with friends and family!
Pro Tips for Making Onigiri AKA Japanese Rice Balls or Rice Triangles
Making onigiri is a delightful experience, and with these tips, you’ll be well on your way to impressing your family and friends!
-
Use the right rice: Short-grain Japanese rice (japonica) is the best choice for onigiri due to its sticky texture, which helps the rice hold its shape. This ensures that your rice balls stay intact even when filled with delicious fillings.
-
Keep your hands wet: Wetting your hands while shaping the onigiri prevents the rice from sticking to your fingers. This makes it much easier to form neat shapes and keeps your hands clean during the process.
-
Experiment with fillings: Don’t be afraid to get creative! Use a variety of fillings such as pickled vegetables, avocado, or even leftover cooked chicken or tofu. This allows you to customize each onigiri according to your taste preferences.
-
Shape them while warm: Shaping the rice into balls or triangles while it’s still warm makes it easier to mold. The warmth also helps release some of the steam, making them fluffier and tastier.
-
Wrap just before serving: If using nori, wrap the onigiri just before serving to keep it crisp. This prevents it from becoming soggy and ensures a delightful contrast in texture when you take a bite.
How to Serve Onigiri AKA Japanese Rice Balls or Rice Triangles
Onigiri can be served in various ways, making it a versatile dish for any occasion. Whether you’re enjoying them as a snack, part of a bento box, or at a casual gathering, here are some ideas on how to present this delightful dish.
Garnishes
-
Sesame seeds: Sprinkling toasted sesame seeds over your onigiri adds a nice crunch and nutty flavor that complements the rice beautifully.
-
Chopped green onions: A sprinkle of finely chopped green onions brightens up the dish with freshness and color while adding a mild onion flavor.
Side Dishes
-
Edamame: These steamed young soybeans are rich in protein and provide a perfect balance with the lightness of onigiri. Simply sprinkle with a bit of sea salt for added flavor.
-
Miso soup: A warm bowl of miso soup pairs wonderfully with onigiri and adds comforting depth. With its umami flavors from miso paste and ingredients like tofu and seaweed, it’s an ideal accompaniment.
-
Japanese pickles (tsukemono): These tangy pickles offer a delightful contrast to the soft rice balls. They add crunch and acidity that enhance the overall dining experience.
-
Vegetable tempura: Lightly battered and fried vegetables such as sweet potatoes, carrots, or zucchini make for crispy side dishes that complement the chewy texture of onigiri perfectly.
Enjoy crafting these delightful Japanese rice balls! With these tips and serving suggestions in mind, you’ll create not only tasty but also visually appealing meals that everyone will enjoy. Happy cooking!
Make Ahead and Storage
This Onigiri recipe is perfect for meal prep! You can easily make a batch ahead of time, allowing for quick lunches or snacks throughout the week. They store well and maintain their delicious flavors, making them an ideal choice for busy days.
Storing Leftovers
- Store onigiri at room temperature for several hours.
- If you plan to keep them longer, place them in an airtight container in the refrigerator.
- Separate layers with parchment paper to prevent sticking.
Freezing
- To freeze, wrap each onigiri tightly in plastic wrap.
- Place wrapped onigiri in a freezer-safe bag or container.
- They can be frozen for up to one month.
Reheating
- For best results, take frozen onigiri out and let them thaw in the refrigerator overnight.
- To reheat, place onigiri in the microwave for about 30 seconds to 1 minute until warmed through.
- Enjoy at room temperature or with freshly wrapped nori!
FAQs
Here are some common questions you might have about making Onigiri AKA Japanese Rice Balls or Rice Triangles.
What types of fillings can I use for Onigiri?
You can fill your onigiri with a variety of ingredients! Some popular fillings include pickled vegetables, cooked chicken, seasoned tofu, avocado, or even leftover stir-fry. The sky’s the limit—be creative!
How long do Onigiri last?
Onigiri are best consumed within a few hours if left at room temperature. If stored properly in the refrigerator, they can last up to 2-3 days. Just remember to bring them back to room temperature before enjoying!
Can Onigiri be made ahead of time?
Absolutely! Onigiri are excellent for meal prep. You can prepare them a day in advance and store them in the fridge. Just ensure they are well-wrapped to maintain freshness.
Are there any vegetarian options for filling Onigiri?
Definitely! There are many vegetarian options available such as sautéed mushrooms, cucumber slices, or mashed avocado mixed with sesame seeds. Feel free to experiment with your favorite veggies!
What is Onigiri AKA Japanese Rice Balls or Rice Triangles typically served with?
Onigiri can be enjoyed alone as a snack or paired with miso soup or salad for a complete meal. They also make a wonderful addition to bento boxes!
Final Thoughts
I hope you feel inspired to try making Onigiri AKA Japanese Rice Balls or Rice Triangles! This dish not only brings together simple ingredients but also allows you to express your creativity with various fillings. Enjoy this comforting treat with family and friends—you won’t be disappointed! Happy cooking!
Onigiri AKA Japanese Rice Balls or Rice Triangles
Onigiri, also known as Japanese Rice Balls or Rice Triangles, are delightful handheld snacks that combine soft, flavorful rice with a variety of fillings. Perfect for picnics, meal prep, or a quick snack, these rice balls are incredibly versatile and easy to make.
- Prep Time: 15 minutes
- Cook Time: 20 minutes
- Total Time: 35 minutes
- Yield: Approximately 8 servings 1x
- Category: Snack
- Method: Cooking
- Cuisine: Japanese
Ingredients
- 2 cups short grain Japanese rice (japonica)
- 3 cups water
- 1/3 cup rice vinegar
- 3 tablespoons sugar
- 1 teaspoon salt
- Fillings (e.g., cooked chicken, tofu, pickled veggies)
Instructions
- Rinse the rice under cold water until it runs clear.
- Cook the rinsed rice in a rice cooker or on the stovetop until tender (about 20 minutes).
- In a saucepan, combine rice vinegar, sugar, and salt over medium heat until dissolved.
- Transfer cooked rice to a bowl and gently mix in the sushi seasoning while still warm.
- Shape the warm rice into balls or triangles using wet hands and create an indentation for filling before sealing.
- Optionally wrap in nori sheets before serving.
Nutrition
- Serving Size: 1 serving
- Calories: 110
- Sugar: 1g
- Sodium: 150mg
- Fat: 0.5g
- Saturated Fat: 0g
- Unsaturated Fat: 0g
- Trans Fat: 0g
- Carbohydrates: 24g
- Fiber: 1g
- Protein: 2g
- Cholesterol: 0mg