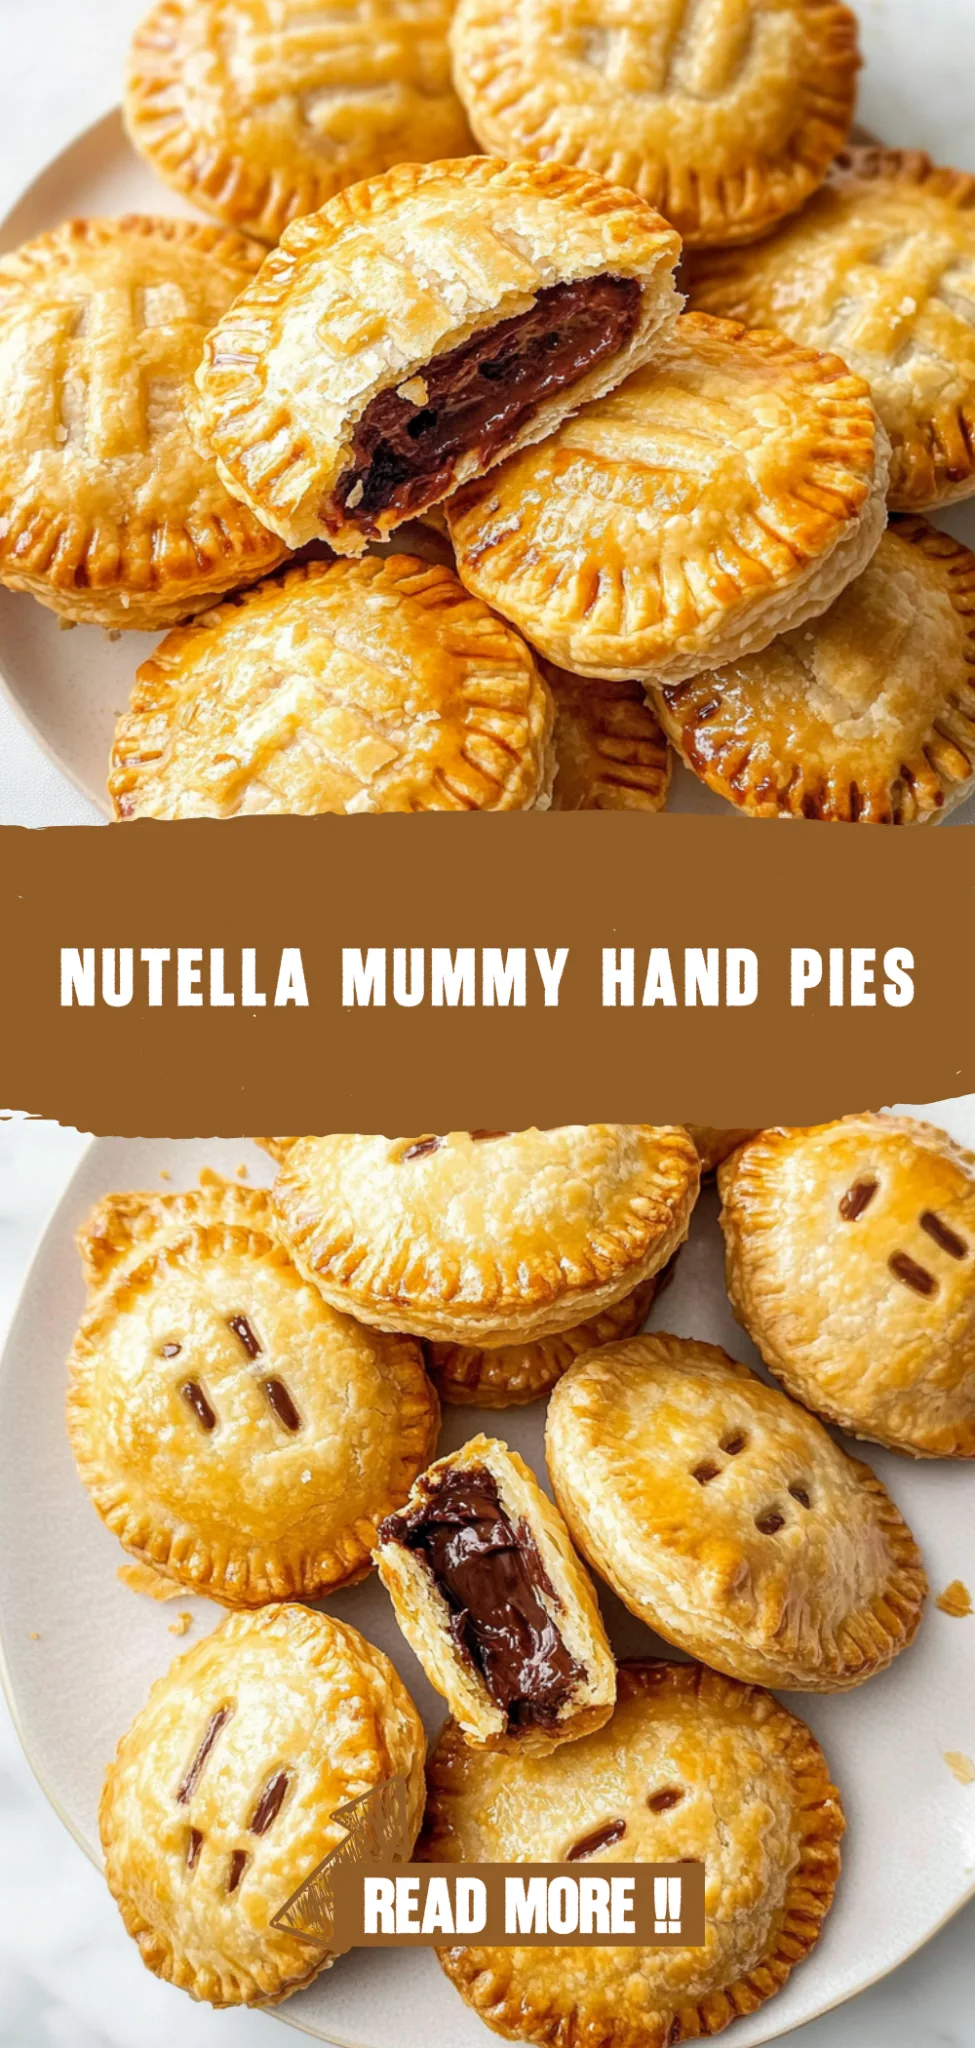
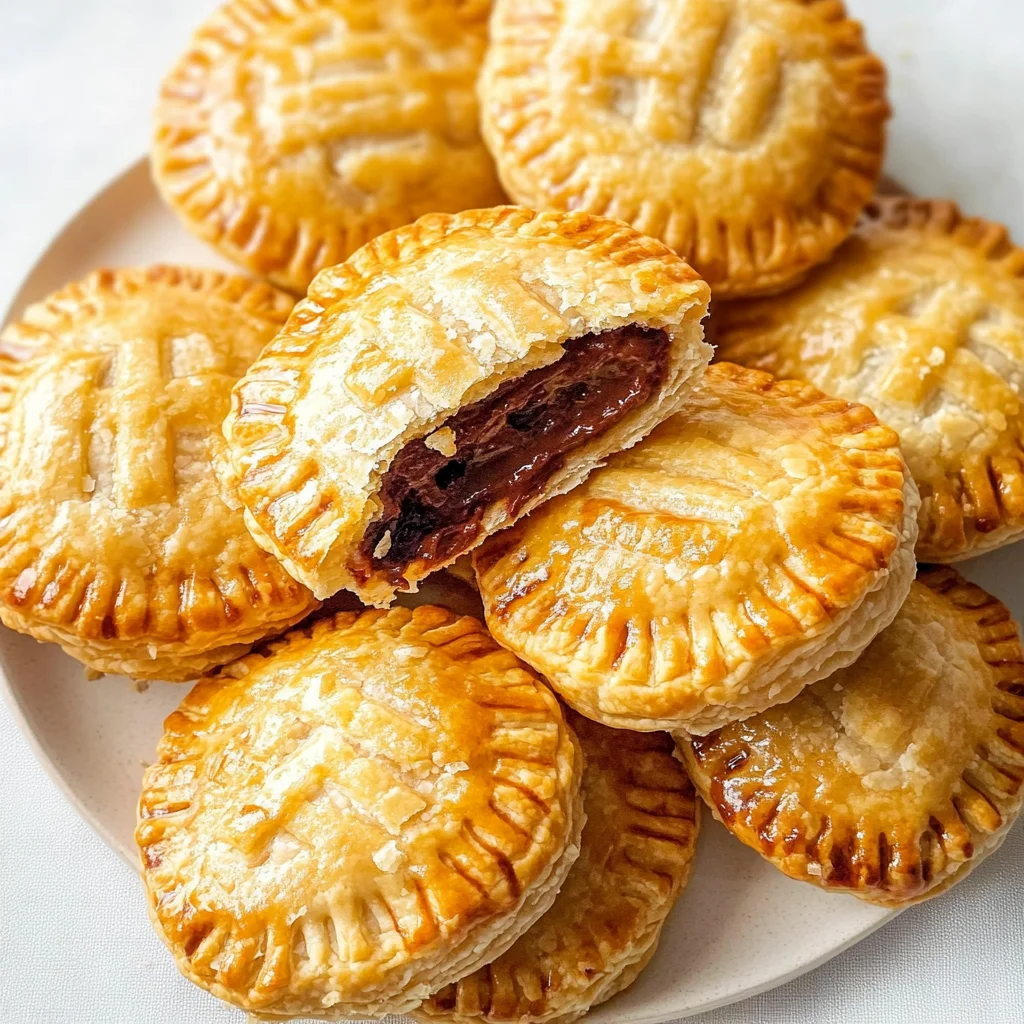
Nutella Mummy Hand Pies: Spooky and Delicious Treats
Spooky, Sweet, and Oh-So-Fun!
Every Halloween, I find myself in the kitchen conjuring up treats that are as fun to make as they are to eat. This year, I decided to whip up some Nutella Mummy Hand Pies, and let me tell you—they were an instant hit! With their flaky crust and gooey Nutella filling, these little pies are not just delicious but also super easy to prepare.
What makes these hand pies so special is the delightful aroma that fills your kitchen while they bake, making it impossible for anyone to resist sneaking a taste. The moment I unveiled them, the kids’ faces lit up with excitement as they spotted the cute mummy decorations. They’re perfect for Halloween parties, cozy family dinners, or even a spooky movie night in!
To elevate your experience, serve these Nutella Mummy Hand Pies warm alongside a scoop of vanilla ice cream or a drizzle of chocolate sauce for extra indulgence. Trust me, once you take that first bite and savor the creamy chocolate goodness wrapped in flaky pastry, you’ll be hooked—and ready to share this festive treat with everyone you know!
What are Nutella Mummy Hand Pies?
Nutella Mummy Hand Pies are delightful pastry pockets filled with rich, creamy Nutella, perfect for Halloween festivities. These treats are made using a buttery pie crust that combines all-purpose flour, cold cubed unsalted butter, and a touch of salt, which creates a flaky and tender exterior. Baked to a golden perfection, they feature a crispy outside while the inside remains indulgently gooey with chocolate-hazelnut goodness. This easy recipe requires minimal cleanup since it can be prepared in one go, making it perfect for both seasoned bakers and those new to the kitchen.
Perfect For:
Halloween Parties: These Nutella Mummy Hand Pies are the perfect spooky treat to delight your guests and add a fun touch to any Halloween celebration. Their cute mummy design is sure to be a hit with both kids and adults alike!
Family Baking Days: Gather the kids for a fun-filled baking session! These hand pies are easy to make together, and the delicious Nutella filling makes for a sweet reward after all the hard work in the kitchen.
Last-Minute Treats: Need a quick dessert for an unexpected gathering? These hand pies come together in no time using store-bought pastry, making them an ideal last-minute treat that looks impressive without much effort.
Cozy Movie Nights: Snuggle up with these delightful mummy hand pies as you enjoy a horror movie marathon. Their warm, gooey Nutella center provides the ultimate comfort food experience on a chilly evening!
Nutella Mummy Hand Pies Ingredients
For the Pie Crust
- 2 cups all-purpose flour – This forms the base of your hand pies and gives them a flaky texture.
- 1 teaspoon salt – Enhances the flavor of the crust, balancing the sweetness of the filling.
- 1 cup unsalted butter (cold and cubed) – Cold butter ensures a tender, flaky crust when baked.
- 6 tablespoons ice water (more if needed) – Helps bind the dough together without making it tough.
For the Filling and Decoration
- 1 cup Nutella – The rich chocolate-hazelnut spread that makes these hand pies irresistibly delicious.
- 1 egg beaten (for egg wash) – Gives your hand pies a beautiful golden color when baked.
- 1 cup white icing (for mummy decoration) – Used to create fun, spooky designs for your Halloween treats.
- 1 cup candy eyes (for decoration) – Adds a playful touch to your Nutella Mummy Hand Pies, making them extra festive.
Kitchen Equipment You’ll Need
- Large mixing bowl
- Rolling pin
- Hand-shaped cookie cutter or template
- Parchment paper
- Fork
- Pastry brush
How to Make Nutella Mummy Hand Pies
Step 1:
In a large bowl, mix together 2 cups of all-purpose flour and 1 teaspoon of salt. Then, cut in 1 cup of cold, cubed unsalted butter until the mixture resembles coarse crumbs. This is key to achieving a flaky pie crust that will perfectly hold your delicious Nutella filling.
Step 2:
Next, stir in 6 tablespoons of ice water, adding it one tablespoon at a time, until the dough begins to come together. Once it does, divide the dough in half, shape each half into discs, wrap them in plastic wrap, and refrigerate for at least 30 minutes. Chilling the dough will help it stay firm while you work with it later.
Step 3:
Preheat your oven to 375°F (190°C) to get it ready for baking. Roll out one disc of dough on a floured surface until it’s about 1/8 inch thick. This thickness is important; too thin and they’ll tear, too thick and they won’t bake evenly.
Step 4:
Using a hand-shaped cookie cutter or template, cut out hand shapes from the rolled-out dough. Place half of these cutouts on a parchment-lined baking sheet to prepare for assembly. Make sure there’s enough space between them so they don’t stick together while baking.
Step 5:
Spoon about a tablespoon of Nutella onto the center of each hand cutout. Then take another hand cutout and place it on top of the Nutella-filled one, sealing the edges with a fork. This not only keeps the filling secure but also adds a lovely decorative touch with the fork marks.
Step 6:
Brush the tops of your hand pies with the beaten egg using a pastry brush. This egg wash will give them that beautiful golden-brown color as they bake in the oven, making them even more enticing!
Step 7:
Bake your hand pies in the preheated oven for 20-25 minutes or until they turn golden brown. Keep an eye on them during baking; the aroma will let you know when they’re getting close!
Step 8:
Once baked, let the pies cool slightly before decorating. Drizzle white icing over the top to create fun ‘bandages’ and add candy eyes for that spooky mummy effect. These cute treats are sure to be a hit for Halloween!
Tips for Making This Perfect
- Chill the butter: Using cold, cubed butter is essential for a flaky pie crust. It prevents the butter from melting into the flour too quickly, helping to create those delicious layers.
- Don’t skip the chilling time: Refrigerating dough for at least 30 minutes allows it to rest. This helps relax the gluten, making your hand pies tender and easier to roll out without shrinking.
- Avoid overworking the dough: Mix just until combined to ensure a tender crust. Overworking activates gluten, which can make your hand pies tough instead of flaky.
- Check for doneness: Keep an eye on your pies as they bake. Look for a golden-brown color, as this indicates that the crust is properly cooked and will have a delightful crunch.
- Seal edges tightly: When assembling the hand pies, ensure you seal the edges well with a fork to prevent Nutella from leaking out during baking. This keeps your filling intact and enhances presentation.
- Let them cool before icing: Allowing the hand pies to cool slightly before decorating with icing ensures that it doesn’t melt off. This helps maintain that spooky mummy look while adding sweetness.
- Experiment with decoration: Feel free to get creative with how you drizzle the icing for ‘bandages.’ Different styles can enhance visual appeal and make your treats even more festive!
Optional Ingredients
- Cream Cheese: Adding a dollop of cream cheese to the Nutella filling introduces a tangy richness that balances the sweetness, creating a delightful creaminess. Simply swirl it into the Nutella before filling your hand pies.
- Cinnamon: A sprinkle of ground cinnamon can elevate your mummies with warm, spicy notes that complement the chocolate flavor beautifully. Mix in about half a teaspoon with the Nutella for an aromatic twist.
- Chopped Apples: Dice up some tart apples and fold them into the filling for a fresh, fruity crunch that adds brightness and texture to each bite. This unexpected addition brings a delicious contrast to the rich chocolate.
- Orange Zest: Brighten your mummies with a teaspoon of freshly grated orange zest, which offers a refreshing citrus aroma and flavor that enhances the overall taste experience. Add it directly into the Nutella mixture for a zesty surprise.
- Sea Salt Flakes: Finish your hand pies with a light sprinkle of flaky sea salt right before serving to create an enticing sweet-and-salty combination that heightens all flavors. Just a pinch will do wonders!
What to Pair with Nutella Mummy Hand Pies?
To complement the rich, chocolatey filling of the Nutella Mummy Hand Pies, consider serving a light and refreshing salad. A simple arugula salad tossed with lemon vinaigrette can provide a zesty contrast to the sweetness of the pies. The peppery notes of arugula will balance the creamy Nutella, creating a delightful interplay of flavors that keeps your palate engaged.
Adding some steamed or roasted vegetables can also enhance your meal experience. Try a medley of roasted Brussels sprouts and carrots, drizzled with balsamic glaze for added sweetness. The earthy flavors of these vegetables not only bring a lovely textural contrast but also make the meal more complete by incorporating savory elements that harmonize with the dessert-like hand pies.
For a comforting side dish, consider serving fluffy mashed potatoes infused with garlic. The creamy texture and subtle flavor of garlic mash will serve as a warm counterpart to the dessert’s richness. This combination makes for a cozy meal that’s perfect for Halloween gatherings, ensuring that every bite feels indulgent yet balanced.
Finally, don’t forget to think about drinks! A chilled glass of sparkling apple cider pairs wonderfully with the Nutella Mummy Hand Pies. The effervescence cuts through the richness while the apple’s natural sweetness echoes the pie’s flavors, making it a festive choice that enhances the overall experience and adds a celebratory touch to your Halloween feast.
Variations and Substitutions
Gluten-Free Flour: For a gluten-free version of the Nutella Mummy Hand Pies, substitute the all-purpose flour with a 1:1 gluten-free baking blend. This will yield a slightly different texture, but the hand pies will still be deliciously flaky and perfect for those avoiding gluten.
Coconut Oil instead of Butter: Swap out unsalted butter for an equal amount of coconut oil for a dairy-free option. This will impart a subtle coconut flavor and create a slightly softer texture, making your hand pies delightfully tender.
Pumpkin Puree in the Filling: Add a seasonal twist by mixing 1/2 cup of pumpkin puree into the Nutella filling. This adds moisture and a hint of fall flavor while still keeping the sweet, chocolatey goodness intact.
Apple Pie Spice Addition: For a warm, spiced profile, mix in 1 teaspoon of apple pie spice to your Nutella before filling the hand pies. This variation gives your mummies an unexpected depth of flavor that’s perfect for Halloween festivities.
Almond Paste Instead of Nutella: If you’re looking for a nutty alternative, use almond paste instead of Nutella. This substitution will provide a different kind of sweetness and richness while adding an exciting almond flavor that pairs wonderfully with the flaky crust.
Mini Chocolate Chips: For added texture and a chocolate boost, sprinkle mini chocolate chips over the Nutella before sealing the hand pies. This creates delightful pockets of melty chocolate that enhance every bite.
Savory Mummy Hand Pies: Transform your hand pies into savory treats by using creamy cheese spreads or herb-infused cream cheese as the filling. The savory base paired with the sweet mummy decoration adds an interesting contrast that will surprise your guests!
To store your Nutella Mummy Hand Pies in the refrigerator, allow them to cool completely before transferring them to an airtight container. They can be kept in the fridge for up to 3 days. When you’re ready to enjoy them again, reheat the hand pies in a preheated oven at 350°F (175°C) for about 10 minutes to restore their flaky texture and warmth.
These hand pies do freeze well, although the crust may lose some of its original crispness upon thawing. To freeze, place the cooled hand pies in a single layer on a baking sheet until firm, then transfer them to a freezer-safe container or zip-top bag, ensuring they are well-sealed to prevent freezer burn. They will keep for up to 2 months in the freezer; when you’re ready to eat them, simply thaw overnight in the fridge and reheat as mentioned above for the best results.
Frequently Asked Questions
Can I use a different type of flour for the pie crust?
Yes, you can substitute all-purpose flour with a gluten-free flour blend if you’re looking for a gluten-free option. Just ensure that the blend is suitable for baking, as some may require additional binding agents.
How long should I refrigerate the pie dough?
Refrigerating the dough for at least 30 minutes is essential for achieving a flaky crust. If you’re short on time, aim for a minimum of 15 minutes, but longer refrigeration will yield better results.
Can I freeze the hand pies before baking them?
Absolutely! You can assemble the hand pies and freeze them before baking. Just make sure to separate them with parchment paper, and when ready to bake, add an extra few minutes to the baking time as they will go into the oven frozen.
What if my dough is too crumbly to roll out?
If your dough feels too crumbly, it likely needs more moisture. Gradually add an additional tablespoon of ice water until it comes together without being sticky. Be careful not to overwork the dough, as this can make it tough.
Can I use a different filling instead of Nutella?
Definitely! While Nutella adds a delicious chocolate-hazelnut flavor, you can substitute it with other fillings like almond butter or fruit preserves. Just keep in mind that different fillings may affect baking time and flavor.
How do I know when the hand pies are done baking?
The hand pies are done when they turn golden brown on top. Keep an eye on them during the last few minutes of baking to prevent burning, and remember that every oven varies slightly in temperature.
What kind of icing should I use for decoration?
For mummy decoration, a simple white icing made from powdered sugar and milk works perfectly. If you’re short on time, store-bought icing can also be used; just look for a thick consistency that will hold its shape when drizzled.
Can I make these hand pies in advance for a party?
Yes! You can prepare the hand pies up to the point of baking and store them in the refrigerator overnight. Bake them fresh just before serving to maintain their flaky texture and deliciousness.
Nutella Mummy Hand Pies
Ingredients
Method
- In a large bowl, mix together the flour and salt. Cut in the cold butter until the mixture resembles coarse crumbs.
- Stir in the ice water, a tablespoon at a time, until the dough comes together. Divide the dough in half, shape into discs, wrap in plastic wrap, and refrigerate for at least 30 minutes.
- Preheat the oven to 375°F (190°C). Roll out one disc of dough on a floured surface to about 1/8 inch thick.
- Cut out hand shapes using a hand-shaped cookie cutter or template. Place half of the cutouts on a parchment-lined baking sheet.
- Spoon a tablespoon of Nutella onto the center of each hand cutout. Place another hand cutout on top and seal the edges with a fork.
- Brush the tops with beaten egg.
- Bake in the preheated oven for 20-25 minutes or until golden brown.
- Let the pies cool slightly, then drizzle white icing over the top to create 'bandages' and add candy eyes.