Reese’s Peanut Butter No-Bake Bars Recipe: Effortlessly I…
Indulgent, Sweet, and Effortlessly Delicious
I still remember the first time I whipped up these Reese’s Peanut Butter No-Bake Bars. It was a lazy Sunday afternoon when I needed a sweet pick-me-up, and let me tell you, the combination of creamy peanut butter and rich chocolate was nothing short of heavenly. The best part? They came together in mere minutes, leaving me with a delightful treat that satisfied my cravings without any fuss.
What makes these bars truly special is the irresistible aroma that fills your kitchen as they set—there’s something about that nutty sweetness that brings back cozy memories of childhood snacks. Whether you’re hosting friends for a movie night or simply craving something sweet after dinner, these bars are sure to impress anyone who takes a bite. Expect smiles and happy sighs as they savor each mouthful!
To elevate your no-bake experience even further, try serving these bars alongside a scoop of vanilla ice cream or drizzling them with extra melted chocolate. You can even sprinkle some crushed peanuts on top for added crunch! Trust me, once you share this Reese’s Peanut Butter No-Bake Bars Recipe with your loved ones, it’ll quickly become a staple in your dessert rotation—perfect for creating cherished moments around the table.
What are Reese’s Peanut Butter No-Bake Bars Recipe?
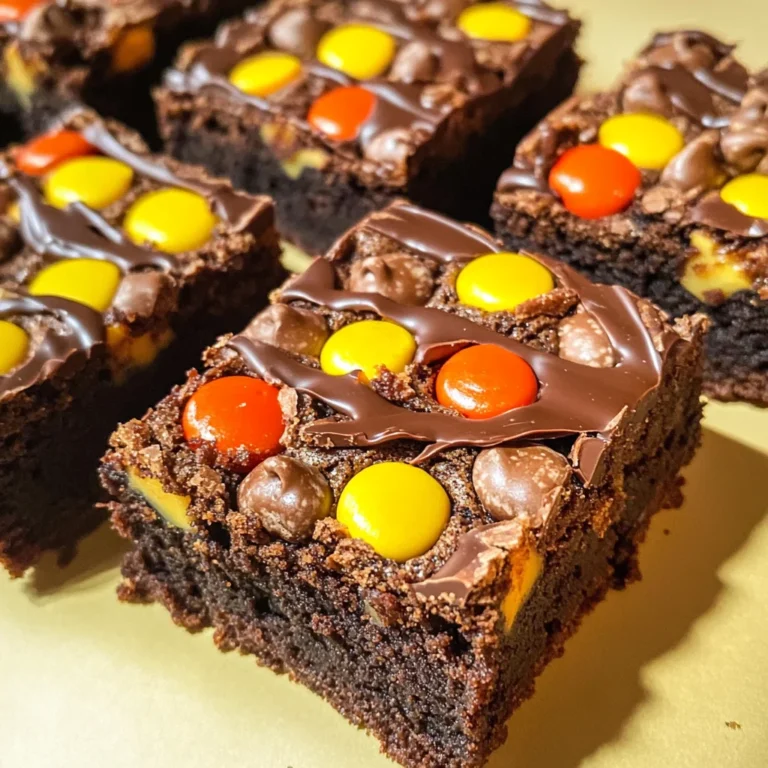
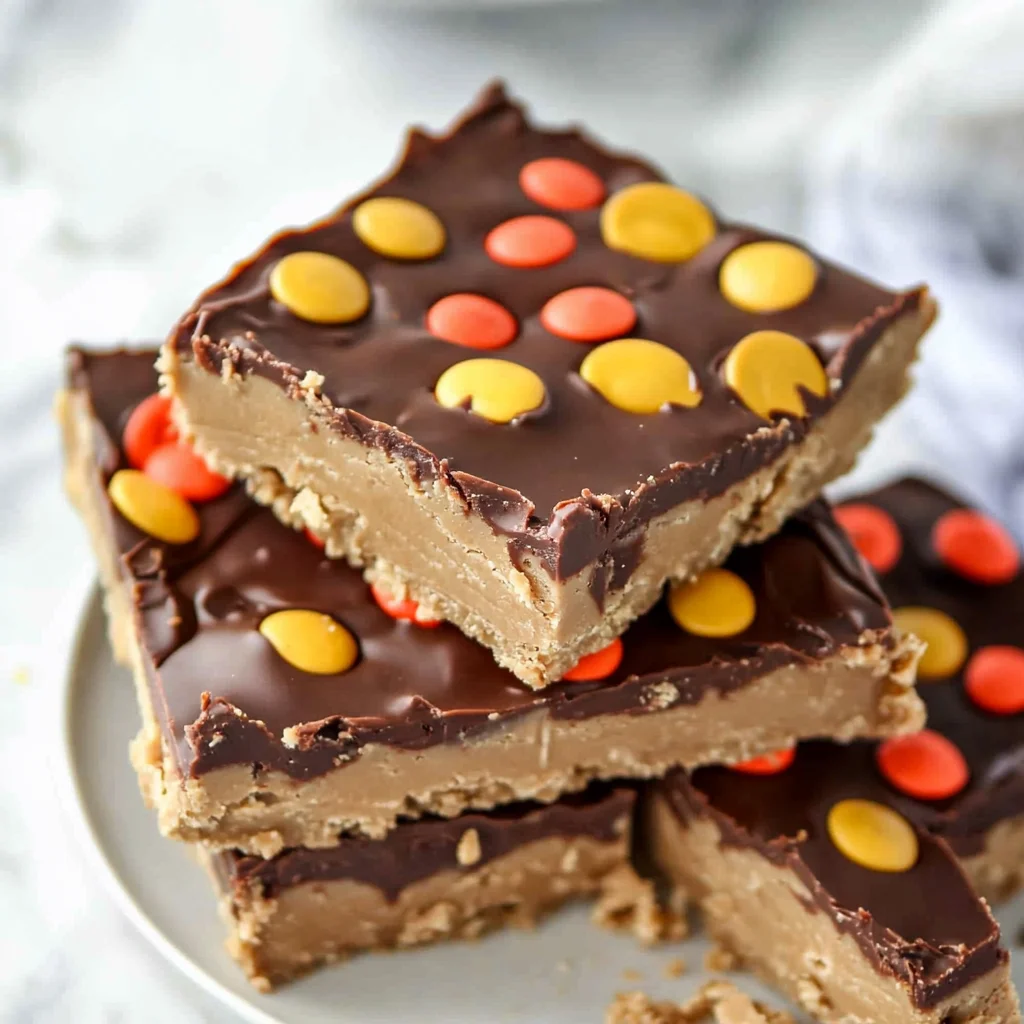
Reese’s Peanut Butter No-Bake Bars are a delightful treat that combines the rich flavors of creamy peanut butter and chocolate without the need for an oven. This easy-to-make dessert features a satisfying base made from graham cracker crumbs, powdered sugar, creamy peanut butter, and melted unsalted butter, creating a decadent, chewy texture that melts in your mouth. Topped with a luscious layer of melted milk chocolate and additional peanut butter, these bars offer a perfect balance of sweetness and nutty goodness. The no-bake method means minimal cleanup and effort, making them an ideal choice for a quick dessert that will impress your friends and family.
Perfect For:
Quick Treats for Busy Days: These no-bake bars come together in just a few minutes, making them the perfect sweet solution when you’re short on time but still want to indulge.
Budget-Friendly Indulgence: With simple ingredients like peanut butter and chocolate, this recipe gives you the rich, decadent flavor of a gourmet dessert without breaking the bank.
Family-Friendly Dessert: Whether it’s an after-school snack or a weekend treat, these bars are easy to scale up for family gatherings, ensuring everyone gets their fill of deliciousness.
Casual Movie Nights: There’s nothing quite like a cozy night on the couch with a plate of these Reese’s Peanut Butter No-Bake Bars—perfect for sharing while binge-watching your favorite shows!
Reese’s Peanut Butter No-Bake Bars Recipe Ingredients
For the Base
- 1 cup graham cracker crumbs – These provide a sweet and crunchy foundation for your bars.
- 1 cup powdered sugar – This adds sweetness and helps bind the ingredients together.
- 1 cup creamy peanut butter – Essential for that rich, nutty flavor that makes these bars irresistible.
- 1/2 cup unsalted butter (melted) – This binds the base together while adding moisture and richness.
—
For the Topping
- 1 cup milk chocolate chips – Perfect for creating a smooth, decadent top layer that complements the peanut butter.
- 1/4 cup creamy peanut butter – This adds an extra layer of peanut buttery goodness to your topping, enhancing the flavor.
Kitchen Equipment You’ll Need

- Mixing bowl
- 9×9 inch baking dish
- Microwave-safe bowl
- Rubber spatula
- Measuring cups
- Sharp knife
How to Make This Recipe
Step 1:
In a mixing bowl, combine 1 cup of graham cracker crumbs, 1 cup of powdered sugar, 1 cup of creamy peanut butter, and 1/2 cup of melted unsalted butter. Mix these ingredients together until they form a cohesive mixture. You want it to be well combined, so take your time and ensure there are no dry spots.
Step 2:
Once your mixture is ready, press it evenly into the bottom of a greased 9×9 inch baking dish. Use your fingers or the back of a spatula to spread it out nicely, making sure it’s packed down firmly. This will create a solid base for your bars, so aim for an even layer throughout.
Step 3:
In a microwave-safe bowl, combine 1 cup of milk chocolate chips and 1/4 cup of creamy peanut butter. This combination will create a rich topping that complements the base perfectly.
Step 4:
Microwave the bowl in 30-second intervals, stirring in between each round until the mixture is melted and smooth. Keep an eye on it to avoid overheating—smoothness is key here!
Step 5:
Once melted, pour the chocolate mixture over your peanut butter base and spread it evenly with a spatula. Make sure every corner is covered for that delicious chocolate experience in every bite.
Step 6:
Refrigerate the bars for at least 45 minutes or until they are set. This step is crucial as it allows everything to firm up beautifully; you’ll know they’re ready when they feel solid to the touch.
Step 7:
After chilling, remove the bars from the fridge and cut them into squares with a sharp knife. Serve them up and enjoy your homemade Reese’s Peanut Butter No-Bake Bars!
Tips
- Use fresh ingredients: Ensure your peanut butter is creamy and smooth for the best texture. Stale or chunky varieties can result in a grainy base that lacks the desired richness.
- Measure accurately: Level off your graham cracker crumbs and powdered sugar with a knife for precise measurements. Accurate ratios are crucial to achieving the perfect balance of sweetness and structure in your bars.
- Press firmly: When forming the base, use the back of a measuring cup or your hands to press down firmly. A well-compressed base prevents the bars from crumbling apart when you cut them later.
- Microwave carefully: When melting chocolate chips and peanut butter, do it in short intervals, stirring frequently. This prevents scorching and ensures a smooth topping that flows evenly over the base.
- Chill longer if needed: If you have time, chill the bars for an hour or more instead of the minimum 45 minutes. This extra time allows them to set properly, making cutting easier and cleaner.
- Warm knife for cutting: Dip your knife in hot water and wipe it dry before slicing into the bars. A warm knife glides through more smoothly, resulting in neat squares without crumbling edges.
Optional Ingredients
- Sea salt: A sprinkle of flaky sea salt on top enhances the sweetness and adds a delightful crunch, creating a perfect balance with the rich peanut butter and chocolate flavor.
- Cayenne pepper: For those who enjoy a little heat, adding a pinch of cayenne pepper to the base mixture gives your bars a surprising kick that pairs wonderfully with the creamy peanut butter.
- Chopped pecans: Adding chopped pecans provides a lovely nutty crunch and complements the flavors in the bars. Simply fold them into the base or sprinkle them on top before serving.
- Orange zest: A touch of fresh orange zest brightens up the rich flavors, adding a citrusy aroma and refreshing contrast. Mix it into the chocolate topping for an extra zing.
- Caramel drizzle: A sweet caramel sauce drizzled over the bars adds an indulgent layer of richness and visual appeal. Use it as a finishing touch right before serving for an elegant presentation.
What to Serve With This?
A fresh salad can beautifully complement the rich flavors of Reese’s Peanut Butter No-Bake Bars. Consider a spinach salad dressed with a light vinaigrette, topped with sliced strawberries and crumbled feta cheese. The tartness of the berries and the acidity of the dressing provide a refreshing contrast to the creamy sweetness of the bars, while the feta adds a delightful salty note that balances the dessert’s richness.
For those who crave warmth, roasted sweet potatoes make an excellent side. Their natural sweetness echoes the peanut butter in the bars, creating a harmonious flavor profile. Additionally, their soft texture contrasts with the crunchiness of the graham cracker base, offering a satisfying variety in each bite as you enjoy your dessert.
If you’re looking for something more indulgent, serve your bars alongside a tall glass of cold milk or even a scoop of vanilla ice cream. The creamy texture of both drinks enhances the smooth peanut butter and chocolate layers while cooling down any sweetness from the bars. This pairing creates a classic dessert experience that feels comforting and nostalgic, perfect for sharing with loved ones.
Variations and Substitutions
Gluten-Free Graham Crackers: Swap traditional graham cracker crumbs with gluten-free graham crackers or almond flour for a gluten-free version. This change maintains the bar’s sweetness while catering to those with gluten sensitivities.
Maple Syrup Instead of Powdered Sugar: Replace powdered sugar with pure maple syrup for a natural sweetener alternative. This swap adds a delightful maple flavor, creating a more complex sweetness and a slightly chewier texture in the bars.
Crunchy Peanut Butter: Use crunchy peanut butter instead of creamy for an added texture contrast. The bits of peanut will provide a delightful crunch and enhance the overall peanut flavor, making each bite even more satisfying.
Coconut Oil in Place of Butter: Substitute melted unsalted butter with coconut oil for a dairy-free option. This variation will impart a subtle coconut flavor and a slightly firmer texture once chilled, perfect for those looking for a healthier alternative.
Dark Chocolate Chips: Opt for dark chocolate chips instead of milk chocolate for a richer, more intense chocolate flavor. This twist not only enhances the taste but also provides a sophisticated edge to your no-bake bars.
Add Chopped Nuts: Incorporate chopped nuts like almonds or pecans into the base mix for an extra crunch and nutty flavor. This variation adds depth and richness to the bars while contributing healthy fats and protein, making them even more satisfying.
Peanut Butter Protein Powder: Mix in some peanut butter protein powder into the base to give your bars an extra protein punch. This addition makes these treats not only delicious but also ideal as a post-workout snack, without compromising on flavor!
How to Store
To store your Reese’s Peanut Butter No-Bake Bars in the refrigerator, allow them to cool completely before cutting them into squares. Place the bars in an airtight container, separating layers with parchment paper to prevent sticking, and they will keep well for up to one week. If you want to enjoy them chilled, simply take them out of the fridge a few minutes before serving to restore their creamy texture.
These no-bake bars freeze well but may lose some of their original texture when thawed. To freeze, wrap individual bars tightly in plastic wrap and place them in a freezer-safe container or bag. They can be stored frozen for up to three months; when you’re ready to eat them, thaw them in the refrigerator overnight and enjoy them cold or let them sit at room temperature for about 15 minutes before serving to regain their ideal consistency.
FAQ
Can I use crunchy peanut butter instead of creamy peanut butter for the base?
Yes, you can use crunchy peanut butter if you prefer a bit of texture in your bars. Just keep in mind that it may alter the smoothness of the overall mixture, but it will still taste delicious.
Can I substitute honey or maple syrup for powdered sugar in this recipe?
Using honey or maple syrup in place of powdered sugar isn’t recommended as it will change the consistency of the base. If you’re looking for a lower-sugar option, consider using a sugar substitute designed for baking to maintain the right texture.
How long do I need to refrigerate the bars before serving?
You should refrigerate the bars for at least 45 minutes or until they are set. This chilling time allows the layers to firm up properly, making them easier to cut into squares and enjoy.
Can I make these no-bake bars ahead of time?
Absolutely! These Reese’s Peanut Butter No-Bake Bars can be made a day or two in advance. Just store them in an airtight container in the refrigerator until you’re ready to serve.
Is there a gluten-free option for graham cracker crumbs?
Yes, you can find gluten-free graham cracker crumbs at many grocery stores. They work just as well in this recipe, ensuring everyone can enjoy these tasty bars without worry.
Can I use dark chocolate chips instead of milk chocolate chips?
Definitely! Dark chocolate chips can add a rich flavor to your bars and pair nicely with the sweetness of the peanut butter base. Just keep an eye on the melting process as dark chocolate may have different melting properties compared to milk chocolate.
What size baking dish should I use for this recipe?
A 9×9 inch baking dish is ideal for this recipe. If you want thicker bars, you could use a smaller dish, but be sure to increase chilling time slightly until they set properly.
Reese’s Peanut Butter No-Bake Bars Recipe
Ingredients
Method
- In a mixing bowl, combine graham cracker crumbs, powdered sugar, creamy peanut butter, and melted butter. Mix until well combined.
- Press the mixture evenly into the bottom of a greased 9x9 inch baking dish.
- In a microwave-safe bowl, combine milk chocolate chips and creamy peanut butter.
- Microwave in 30-second intervals, stirring in between, until melted and smooth.
- Pour the chocolate mixture over the peanut butter base and spread evenly.
- Refrigerate the bars for at least 45 minutes or until set.
- Once set, cut into squares and serve.