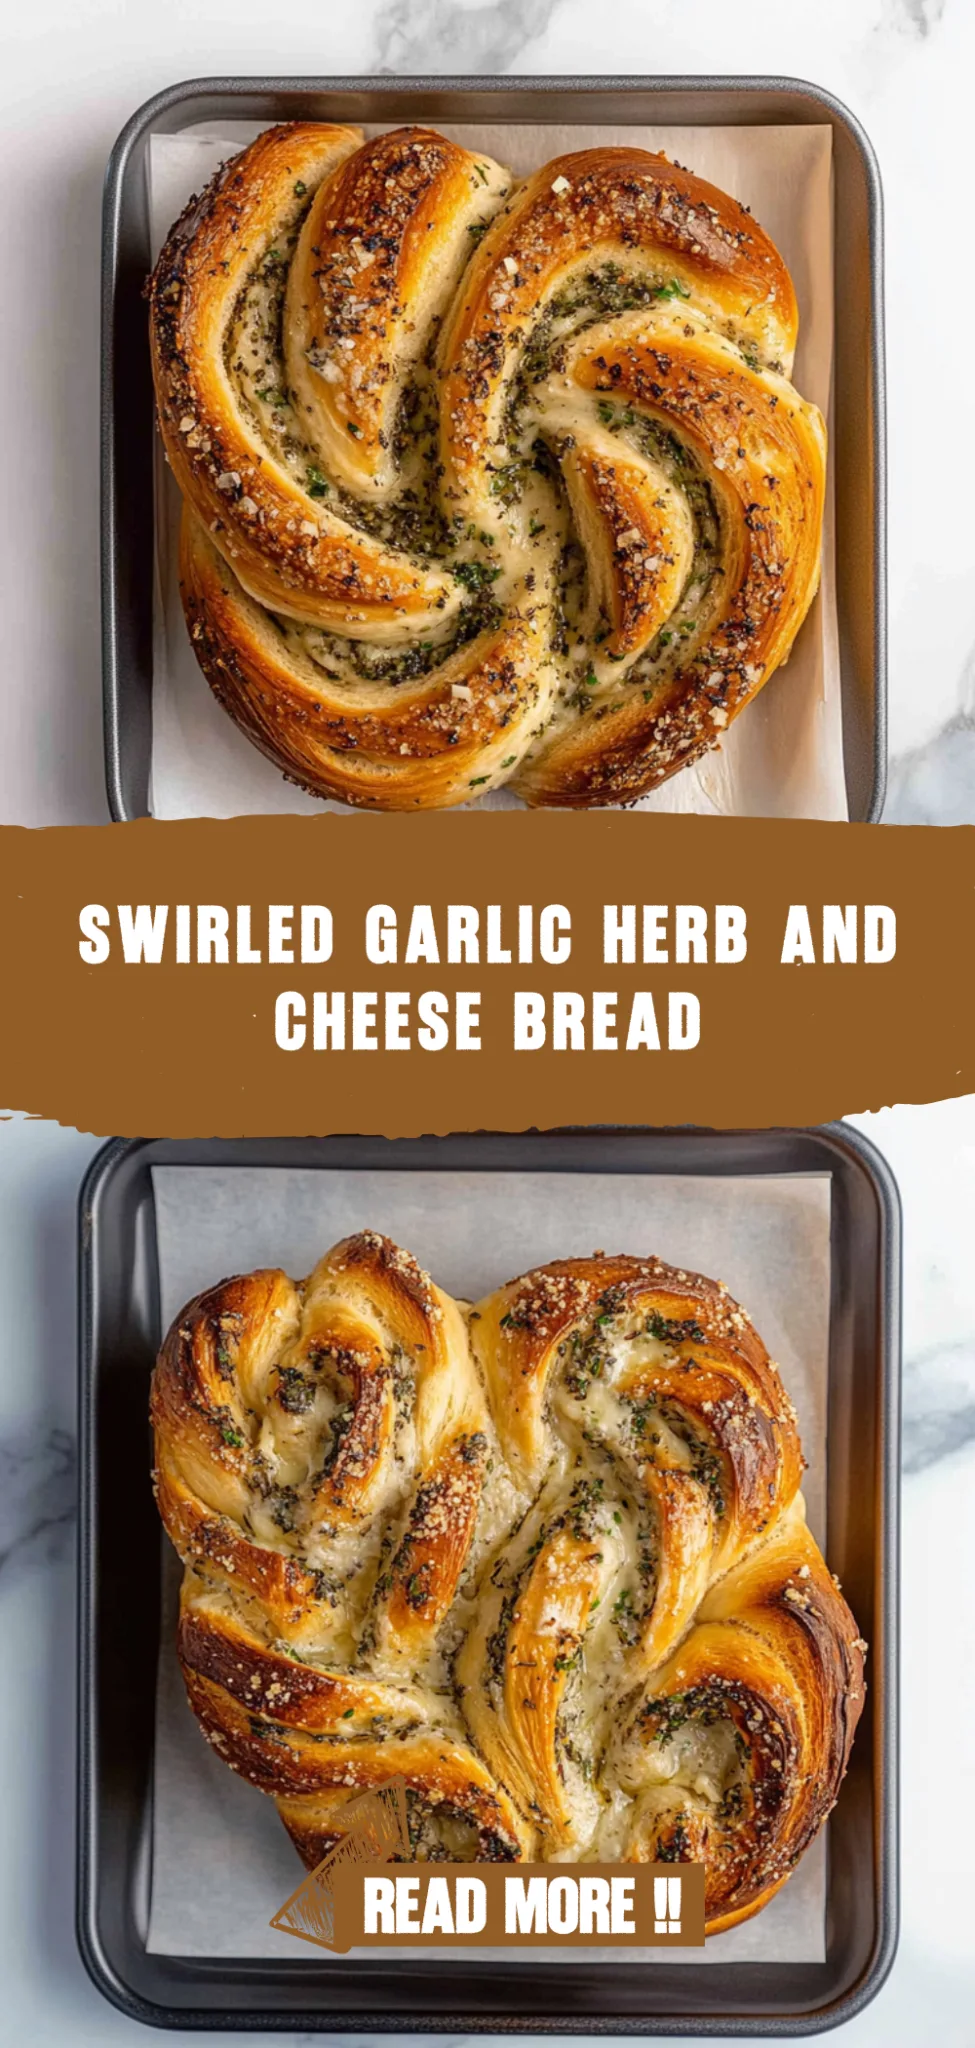
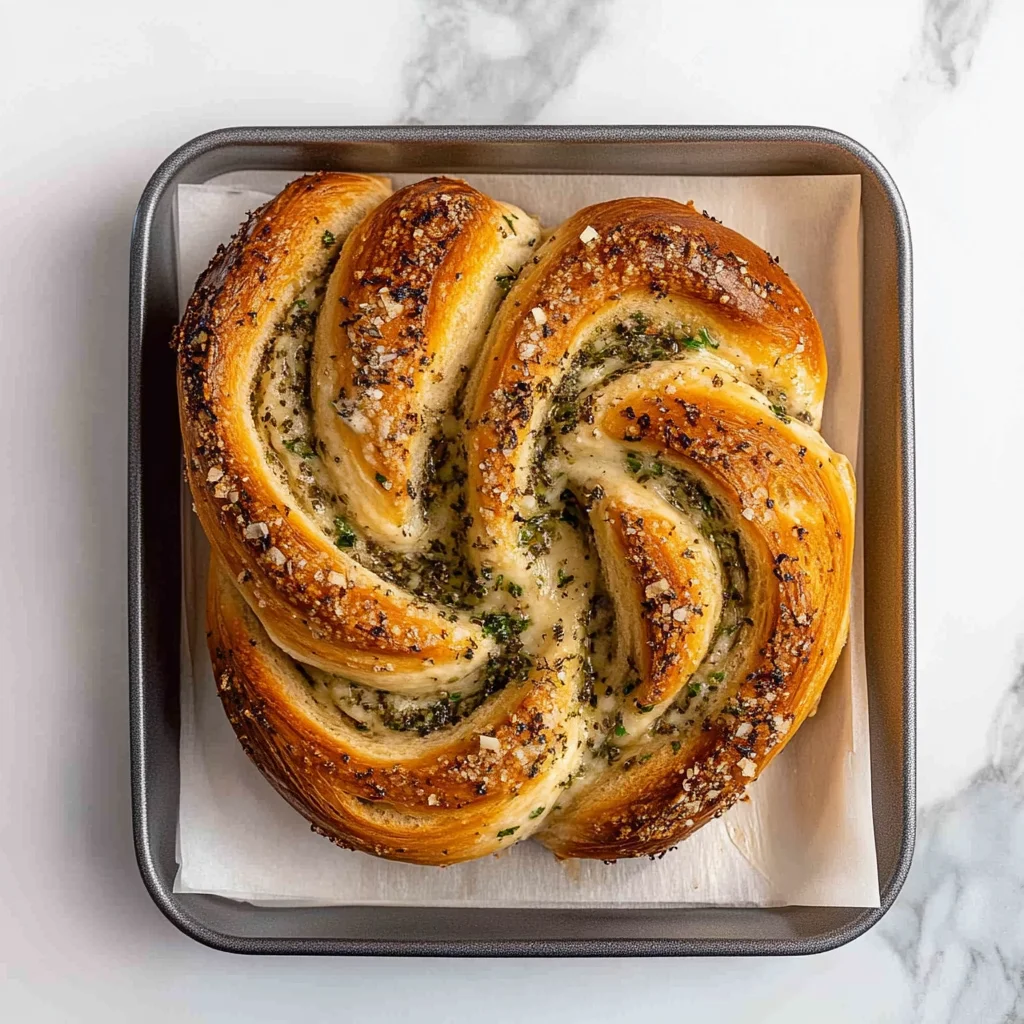
Swirled Garlic Herb And Cheese Bread: Comforting Delight
Warm, Cheesy, and Irresistibly Delicious
I still remember the first time I baked this Swirled Garlic Herb And Cheese Bread—it was a rainy afternoon, and the house filled with the most incredible aroma. The soft, pillowy texture combined with the rich flavors of garlic and herbs made it an instant favorite, and I couldn’t believe how easy it was to whip up!
What truly makes this bread special is how it transforms any meal into a cozy experience. Whether you’re enjoying a quiet dinner at home or hosting friends for a casual get-together, the delightful smell wafting from the oven guarantees smiles all around. It’s the perfect companion for date nights or busy weekdays when you want a touch of comfort without all the fuss.
Slice it warm and serve alongside a fresh salad or your favorite soup for a complete meal. You can even top it with extra melted cheese or a sprinkle of herbs for an added burst of flavor! Trust me, once you try this Swirled Garlic Herb And Cheese Bread, you’ll find yourself making it again and again.
What are Swirled Garlic Herb And Cheese Bread?
Swirled Garlic Herb And Cheese Bread is a delightful baked bread that combines the savory flavors of garlic and fresh herbs with the rich taste of cheese, making it a perfect accompaniment to any meal. This soft, pillowy bread is crafted from a simple dough made with all-purpose flour, instant yeast, sugar, salt, warm water, and olive oil, which gives it a tender texture and a slight chew. When baked, it develops a beautifully golden crust that contrasts with its moist interior. Typically prepared in the oven, this recipe offers an effortless cooking experience with minimal cleanup required, allowing you to enjoy this delicious creation without much fuss.
Perfect For:
- Family Dinners: This swirled garlic herb and cheese bread is a delightful addition to any family meal, making it easy to bring everyone together around the table for a cozy, comforting experience.
- Impressive Gatherings: With its beautiful swirls and aromatic flavors, this bread will wow your guests at parties or potlucks, making it a showstopper that pairs perfectly with a variety of dishes.
- Budget-Friendly Treat: Enjoying gourmet flavors doesn’t have to break the bank—this homemade bread offers delicious taste and satisfying texture without the restaurant price tag.
- Rainy Day Comfort: There’s nothing quite like the warmth of freshly baked bread on a gloomy day. The savory aroma of garlic and herbs will fill your home with comfort, making it the perfect remedy for those dreary afternoons.
Swirled Garlic Herb And Cheese Bread Ingredients
For the Dough
- 3 cups all-purpose flour (plus more for dusting) – This is the foundation of your bread, giving it that delightful texture.
- 1 packet instant yeast – Helps the dough rise quickly, resulting in a light and airy bread.
- 1 teaspoon sugar – A touch of sweetness to nourish the yeast for perfect rising.
- 1 teaspoon salt – Enhances flavor and controls yeast activity for balanced fermentation.
- 1 cup warm water (about 110°F) – Activates the yeast and helps form a cohesive dough.
- 2 tablespoons olive oil – Adds moisture and richness, contributing to a softer crumb.
For the Filling
- 4 cloves garlic (minced) – Infuses the bread with aromatic flavor, making each bite irresistible.
- 2 tablespoons fresh parsley (chopped) – Brightens up the filling, adding freshness and color.
- 2 tablespoons fresh basil (chopped) – Offers a sweet, peppery note that complements the garlic beautifully.
- 1 cup shredded mozzarella cheese – Melts wonderfully, creating gooey pockets of cheesy goodness throughout.
- 1 cup grated Parmesan cheese – Adds a sharp, savory depth of flavor that elevates this Swirled Garlic Herb And Cheese Bread.
Kitchen Equipment You’ll Need
- Mixing bowl
- Measuring cups
- Measuring spoons
- Rolling pin
- Loaf pan
- Clean kitchen towel
- Wire rack
How to Make Swirled Garlic Herb And Cheese Bread
Step 1:
In a mixing bowl, combine 1 cup of warm water (about 110°F), 1 teaspoon of sugar, and 1 packet of instant yeast. Let this mixture sit for about 5 minutes until it becomes frothy. This step is crucial as it activates the yeast, ensuring your bread will rise beautifully.
Step 2:
Next, add 3 cups of all-purpose flour, 1 teaspoon of salt, and 2 tablespoons of olive oil to the yeast mixture. Stir everything together until a dough begins to form. You want to see a cohesive ball coming together—this is a sign that you’re on the right track!
Step 3:
Now it’s time to knead! Transfer the dough to a floured surface and knead it for about 10 minutes until it feels smooth and elastic. Don’t rush this step; kneading develops the gluten, which gives your bread its wonderful texture.
Step 4:
Once kneaded, place the dough in a greased bowl, covering it with a cloth. Let it rise in a warm place for about 1 hour or until it has doubled in size. Keep an eye on it; when it’s puffed up nicely, you’re ready for the next step!
Step 5:
While the dough is rising, prepare your filling. In a small bowl, mix together 4 cloves of minced garlic, 2 tablespoons each of chopped fresh parsley and basil, along with 1 cup of shredded mozzarella cheese and 1 cup of grated Parmesan cheese. This herby cheese mixture is going to make your bread irresistible!
Step 6:
Preheat your oven to 375°F (190°C) so it’s ready when you’re done shaping the bread. The aroma will be divine as it bakes!
Step 7:
After the dough has risen, punch it down gently to release any air bubbles and roll it out on a floured surface into a rectangle about 1/2 inch thick. This is where you create that beautiful canvas for your delicious filling.
Step 8:
Spread the cheesy garlic herb filling evenly over the rolled-out dough, making sure to leave a small border around the edges. This allows you to seal your bread properly without any filling escaping during baking.
Step 9:
Now roll the dough tightly from one end to the other. Once rolled up, pinch the seams to seal in all those tasty ingredients. This will help keep everything secure inside while baking.
Step 10:
Place the rolled dough seam-side down in a greased loaf pan. This positioning helps maintain its shape while rising and baking.
Step 11:
Cover the loaf pan and let it rise again for another 30 minutes. After this rise, you should notice that your bread has expanded even more—we’re getting close!
Step 12:
Bake in your preheated oven for about 25-30 minutes until it’s golden brown on top and sounds hollow when tapped gently. The perfect bake will fill your kitchen with an enticing aroma!
Step 13:
Once baked, let the bread cool in the pan for about 10 minutes before transferring it to a wire rack to cool completely. Allowing it some time will help set that crispy exterior while keeping the inside soft and flavorful!
Tips
- Use the right water temperature: Ensure your water is around 110°F to activate the yeast effectively. Too hot can kill the yeast, while too cool won’t activate it properly, leading to a dense bread.
- Knead until smooth: Kneading for about 10 minutes develops gluten, which gives the bread its structure and chewy texture. If you skip this step, your bread may turn out flat and crumbly.
- Check for proper rising: When letting the dough rise, it should double in size. If it hasn’t risen enough, the bread will be dense and less flavorful. Be patient; good things take time!
- Don’t rush the filling preparation: Mixing the garlic and herbs with cheese beforehand allows flavors to meld together beautifully. This enhances the overall taste of the filling when baked into the bread.
- Seal those edges well: When rolling up your dough, make sure to pinch the seams tightly. A good seal prevents filling from leaking out during baking, keeping your swirls intact.
- Listen for doneness: Tap the bottom of your loaf after baking; if it sounds hollow, it’s perfectly done! If not, return it to the oven for a few more minutes — this ensures a well-cooked interior.
- Cool completely before slicing: Allowing your bread to cool on a wire rack helps maintain its texture and flavor. Slicing too soon can result in a gummy center, ruining that perfect soft bite!
Optional Ingredients
- Feta cheese: Crumble some feta into the filling for a tangy kick that complements the garlic and herbs beautifully. It adds a creamy texture and a delightful contrast to the mozzarella.
- Red pepper flakes: Sprinkle in some red pepper flakes for a touch of heat that elevates the flavors and adds an exciting spice to each bite. Adjust the amount based on your heat preference!
- Sautéed spinach: Incorporate freshly sautéed spinach for a pop of color and an earthy flavor that pairs wonderfully with the cheesy filling. Simply chop it finely and mix it in with the other ingredients.
- Lemon zest: Add a teaspoon of lemon zest to brighten up the bread with a refreshing citrus note, enhancing the overall flavor profile. Mix it into the dough or sprinkle on top before baking for extra aroma.
- Balsamic glaze: Drizzle balsamic glaze over slices just before serving for a sweet and tangy finish that beautifully contrasts with the savory elements of the bread. It’s an elegant touch that makes this dish even more memorable!
What to Pair with Swirled Garlic Herb And Cheese Bread?
To complement the rich flavors of Swirled Garlic Herb And Cheese Bread, consider serving a fresh salad or light starter. A classic Caesar salad, with its crisp romaine lettuce and creamy dressing, provides a refreshing contrast to the bread’s cheesy and garlicky notes. Alternatively, a simple arugula and cherry tomato salad, drizzled with balsamic vinaigrette, adds a peppery bite that balances the savory elements beautifully.
Steamed or roasted vegetables also make for an excellent pairing. Try pairing your bread with roasted asparagus or Brussels sprouts seasoned with olive oil and lemon zest. The earthy flavors of the vegetables enhance the herbal notes in the bread while their slightly charred texture contrasts nicely with its soft crumb. This combination not only rounds out the meal but also introduces vibrant colors to your plate.
For a comforting side, consider serving your bread alongside a warm bowl of creamy tomato soup. The acidity of the tomatoes cuts through the richness of the cheese and garlic, creating a harmonious balance that elevates both dishes. Another option is buttery mashed potatoes enriched with roasted garlic; this pairing echoes the bread’s flavors while providing a heartwarming element that makes every bite feel indulgent.
Lastly, don’t forget about drink pairings that can elevate your dining experience. A chilled Sauvignon Blanc offers citrusy notes that refresh the palate between bites of garlic herb bread, while a light-bodied red wine like Pinot Noir can bring out the umami from the cheese filling beautifully. For dessert, consider serving alongside lemon sorbet; its bright flavor cleanses the palate and complements the savory aspects of your meal perfectly.
Variations and Substitutions
Whole Wheat Flour: Substitute half of the all-purpose flour with whole wheat flour for a heartier texture and nutty flavor. This adds extra fiber and nutrients, making your bread not only delicious but also a healthier option.
Nutritional Yeast: For a dairy-free version, replace the Parmesan cheese with nutritional yeast. This swap imparts a cheesy flavor while keeping the bread vegan-friendly, creating a delightful umami taste that everyone will love.
Sun-Dried Tomatoes and Feta: Mix in chopped sun-dried tomatoes and crumbled feta cheese in place of mozzarella for a Mediterranean twist. This variation adds vibrant flavors and a tangy richness that elevates the overall taste of the bread.
Garlic Powder Instead of Fresh Garlic: If you’re short on fresh garlic, use garlic powder instead—about 1 teaspoon should suffice. While it lacks the same pungency as fresh garlic, it offers a subtle flavor throughout the bread that still complements the herbs beautifully.
Spinach or Kale Addition: Incorporate finely chopped spinach or kale into your filling for an added nutritional boost and vibrant green color. This veggie addition not only enhances the visual appeal but also provides a fresh, earthy taste that pairs wonderfully with the cheeses.
Herb Blend Swap: Experiment with different herbs by using a blend of thyme, rosemary, and oregano instead of parsley and basil. This swap gives your bread an aromatic profile reminiscent of Italian focaccia, adding depth and complexity to every bite.
Spicy Kick with Red Pepper Flakes: For those who enjoy heat, sprinkle red pepper flakes into your filling mixture. This addition brings warmth and spice to the bread, transforming it into a flavorful treat that tantalizes your taste buds without overwhelming them.
To store your Swirled Garlic Herb and Cheese Bread in the refrigerator, allow it to cool completely before wrapping it tightly in plastic wrap or placing it in an airtight container. This bread will keep well for up to 4 days in the fridge. When you’re ready to enjoy it again, simply reheat slices in a toaster oven or conventional oven at 350°F for about 10 minutes, which will help restore its soft texture and warm flavors.
This dish freezes well, but be aware that the texture may change slightly upon thawing. To freeze, slice the bread into portions and wrap each slice individually in plastic wrap, then place them in a freezer-safe bag or container. It can be stored in the freezer for up to 3 months. To thaw and reheat, remove the desired number of slices from the freezer and let them sit at room temperature for about 30 minutes before reheating them in a toaster oven, ensuring they regain their delightful softness.
Frequently Asked Questions
Can I use a different type of flour for this recipe?
Yes, you can substitute all-purpose flour with bread flour for a chewier texture. If you’re looking for a lighter option, whole wheat flour can also be used, but be aware that it may yield a denser loaf.
Is it possible to make this bread without instant yeast?
If you don’t have instant yeast, you can use active dry yeast instead. Just remember to activate it in warm water with the sugar before adding it to the dough ingredients.
How do I know when my dough has risen enough?
The dough is ready when it has doubled in size and feels puffy to the touch. A quick test is to gently press your finger into the dough; if it leaves an indentation that doesn’t bounce back, it’s ready.
Can I prepare the filling in advance?
Absolutely! You can mix the filling and store it in the refrigerator for up to 24 hours. Just bring it back to room temperature before spreading it on the rolled-out dough.
Can I make this bread gluten-free?
Yes, you can use a gluten-free all-purpose flour blend as a substitute for regular flour. Make sure your yeast is also gluten-free, and follow any additional instructions provided by the flour blend packaging.
What should I do if my bread doesn’t rise properly?
If your bread isn’t rising well, check that your yeast is fresh or consider warming up your environment slightly. A warm place helps yeast become active; a good trick is to place your dough near an oven set on low.
How should I store leftover garlic herb and cheese bread?
Store any leftover bread in an airtight container at room temperature for up to two days. For longer storage, wrap it tightly and freeze for up to three months; just thaw before enjoying!
Swirled Garlic Herb And Cheese Bread
Ingredients
Method
- In a mixing bowl, combine warm water, sugar, and yeast. Let it sit for 5 minutes until frothy.
- Add flour, salt, and olive oil to the yeast mixture. Mix until a dough forms.
- Knead the dough on a floured surface for about 10 minutes until smooth and elastic.
- Place the dough in a greased bowl, cover with a cloth, and let it rise in a warm place for 1 hour or until doubled in size.
- In a small bowl, mix together minced garlic, parsley, basil, mozzarella, and Parmesan cheese.
- Preheat the oven to 375°F (190°C).
- Once the dough has risen, punch it down and roll it out on a floured surface into a rectangle about 1/2 inch thick.
- Spread the filling evenly over the dough, leaving a small border around the edges.
- Roll the dough tightly from one end to the other, then pinch the seams to seal.
- Place the rolled dough seam-side down in a greased loaf pan.
- Cover and let it rise for another 30 minutes.
- Bake in the preheated oven for 25-30 minutes until golden brown and sounds hollow when tapped.
- Let the bread cool in the pan for 10 minutes before transferring to a wire rack to cool completely.